Creating a Windows 11 on Proxmox

Virtualizing Windows 11 isn't as simple as clicking "next" on a wizard. If you try a default install, the installer will block you immediately with a "This PC can't run Windows 11" error. Microsoft's strict hardware requirements mean the VM won't even boot into the desktop without manual intervention.
Beyond just getting it to start, standard hardware emulation makes the experience feel sluggish. If you want a VM that handles heavy IDEs or video playback, you have to move away from default settings and look at how Proxmox interfaces with the underlying silicon.
Phase 1: Preparation
First, you need to download a Windows 11 ISO and upload it to Proxmox. You can download one directly from Microsoft.
You will also need the Windows VirtIO Drivers for disk drivers and guest tools. Click on the link, select the newest version, and download the .iso file.
Phase 2: Creating the VM
Once both ISOs are in your Proxmox storage, click the Create VM button and follow these steps:
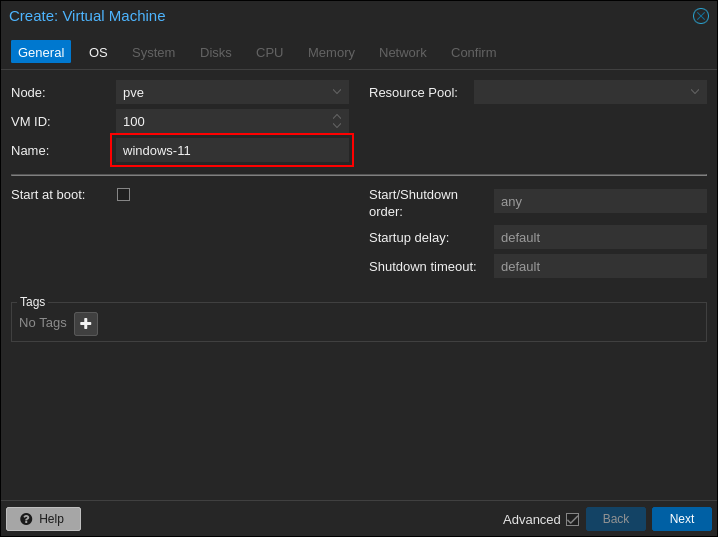
1. General
Set the Name of the VM and click Next.
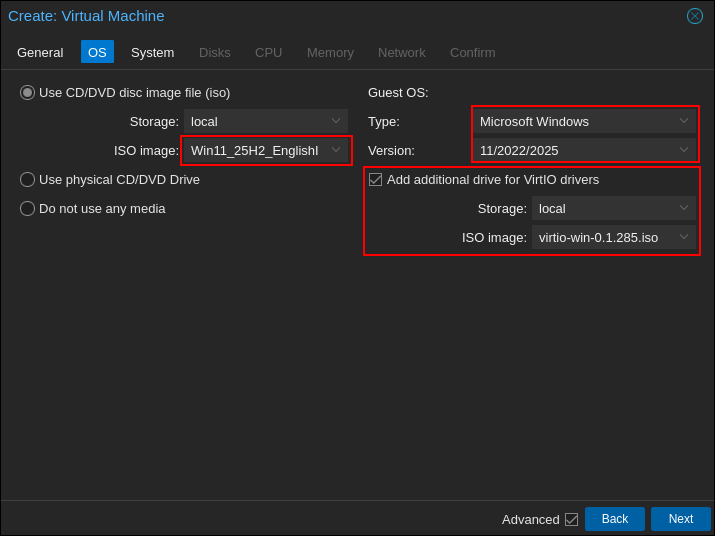
2. OS
- Select your Windows 11 ISO.
- Set Guest OS to
Microsoft Windowsand Version to11/2022/2025. - Check the box Add additional drive for VirtIO drivers and select your VirtIO ISO.
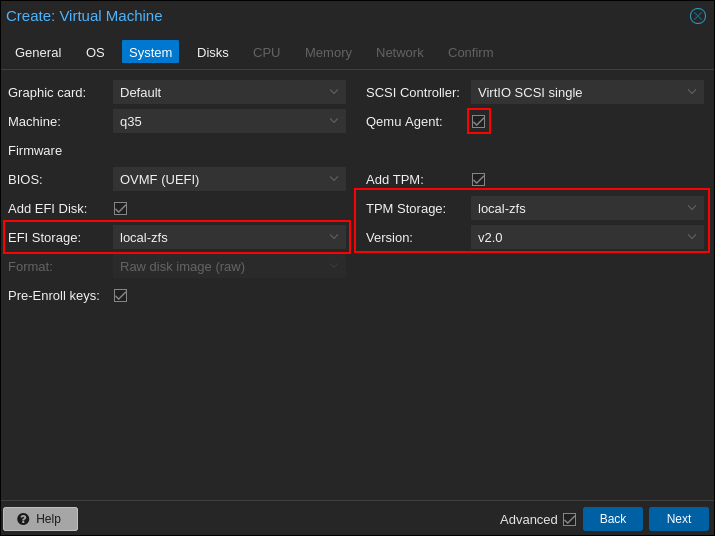
3. System
- Configure EFI Storage.
- Check Qemu Agent.
- Crucial: Check Add TPM and select the storage for the state.
4. Disks
- Set Cache to
Write back. - Enable Discard and SSD emulation (you may need to check the Advanced box to see these).
- Disk Size: Windows 11 requires 64GB, but 128GB is recommended for a usable experience.

5. CPU
- Set Cores to at least
4for smooth performance. Windows needs at least2cores. - Type: Change this to
host. This passes the physical CPU features directly to the VM, significantly increasing speed at the cost of VM portability.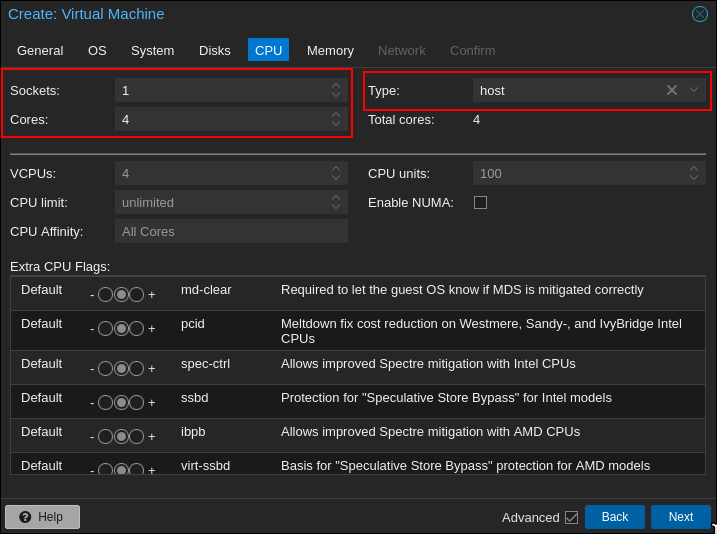
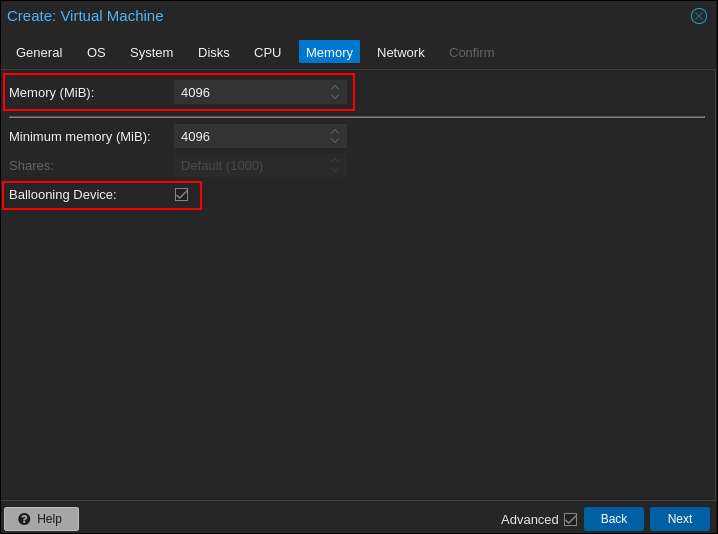
6. Memory
- Windows 11 needs at least 4GB, but 6GB or 8GB is preferred.
- Keep Ballooning enabled to allow dynamic memory management.
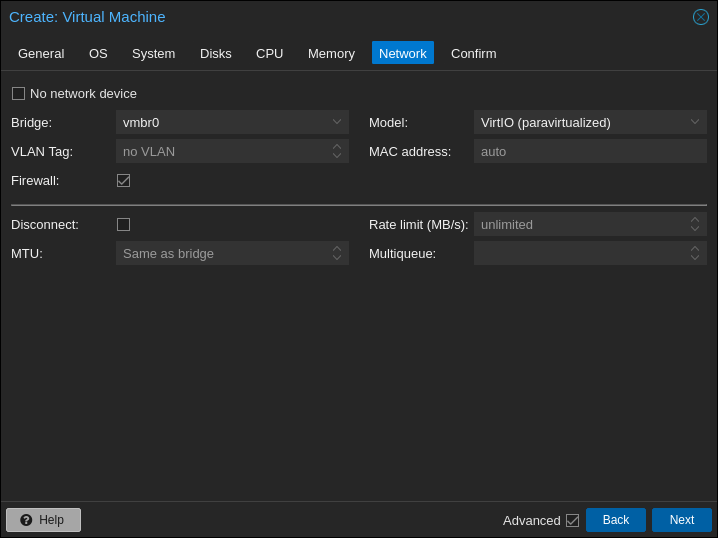
7. Network
Here you can keep the defaults or adapt these settings to your specific network configuration.
Review the summary and click Finish.
Phase 3: Installing Windows
Start the VM and open the Console. Immediately press any key to boot from the ISO.
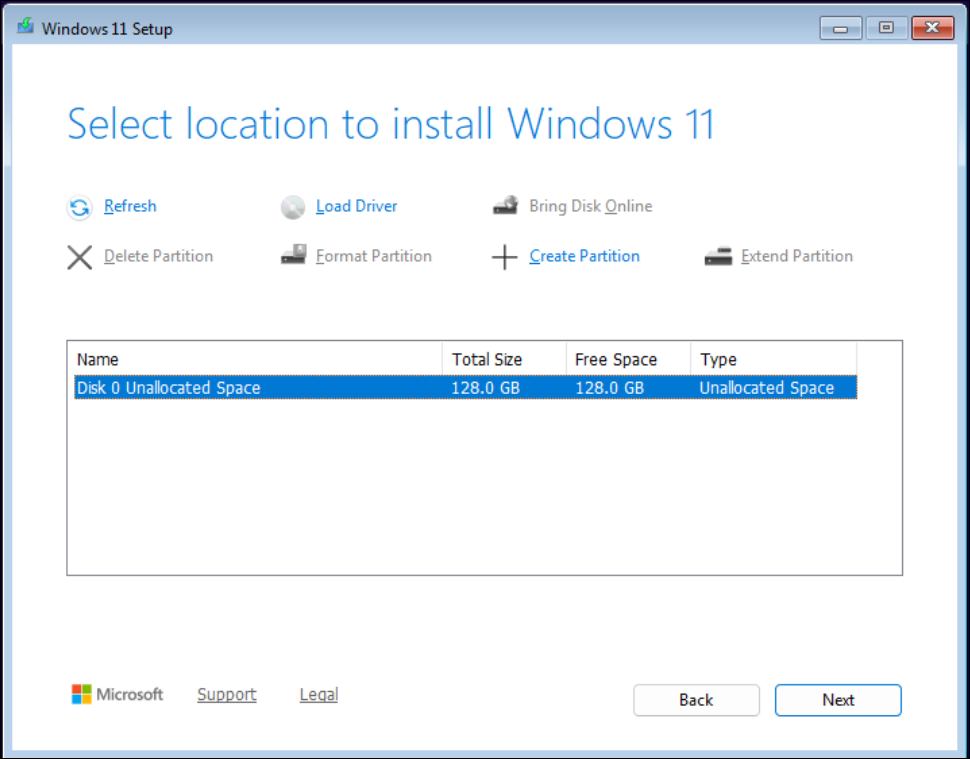
Loading Storage Drivers
Initially, no drive will appear because Windows lacks the VirtIO drivers.
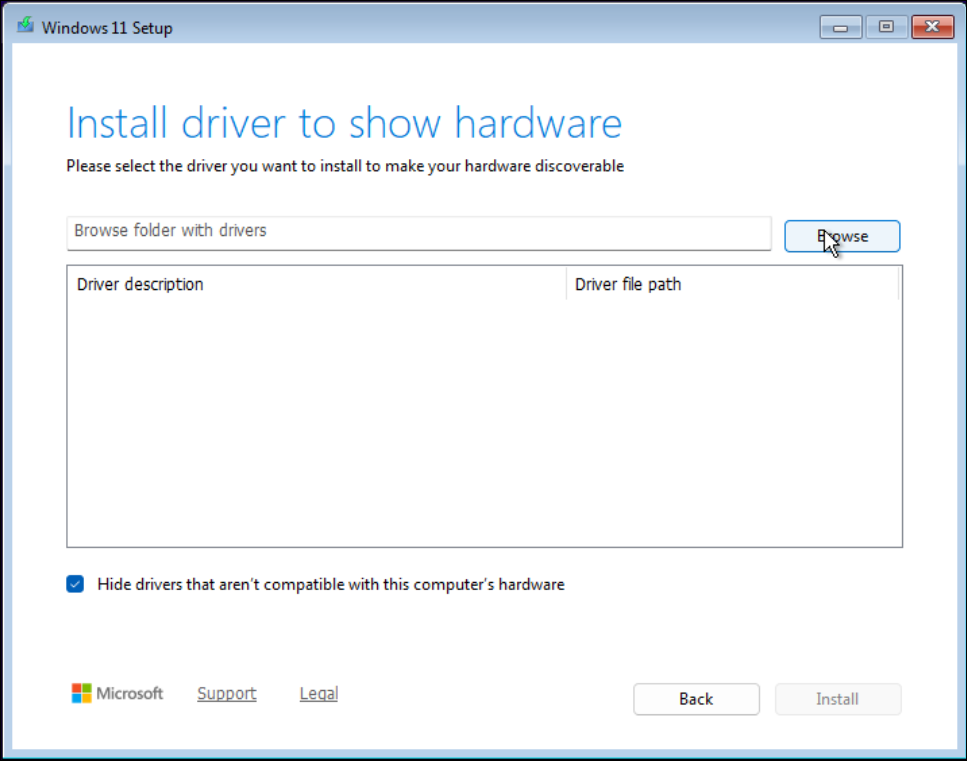
- Click Load Drivers -> Browse.
- Navigate to the VirtIO drive:
\amd64\w11and click OK.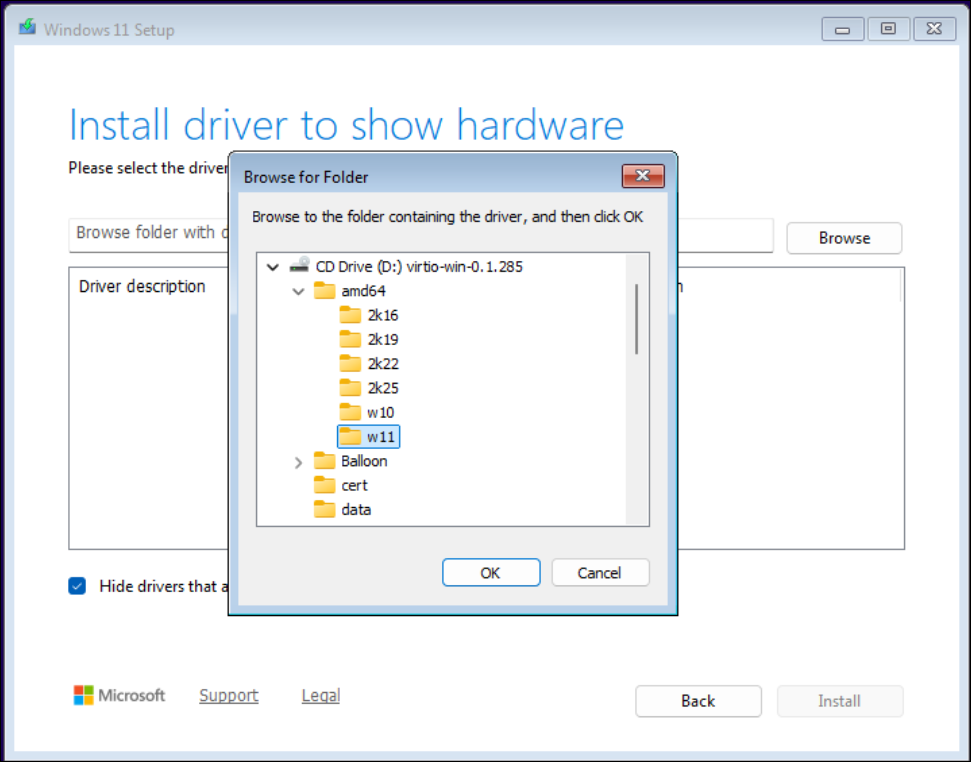
- Select Red Hat VirtIO SCSI pass-through controller and click Install.
- Your disk will now appear. Select it and click Next.
The Network Requirement
Windows 11 requires an internet connection during setup, but the VirtIO network driver isn't active yet. You have two fixes:
- Option A (The Driver Way): Click Install drivers, browse the VirtIO ISO, and select the root directory. Windows will find the
.msiand enable the network. - Option B (The Bypass): Press
Shift + F10. In the CMD window, type:OOBE\bypassnroThe VM will reboot, allowing you to select "I don't have internet."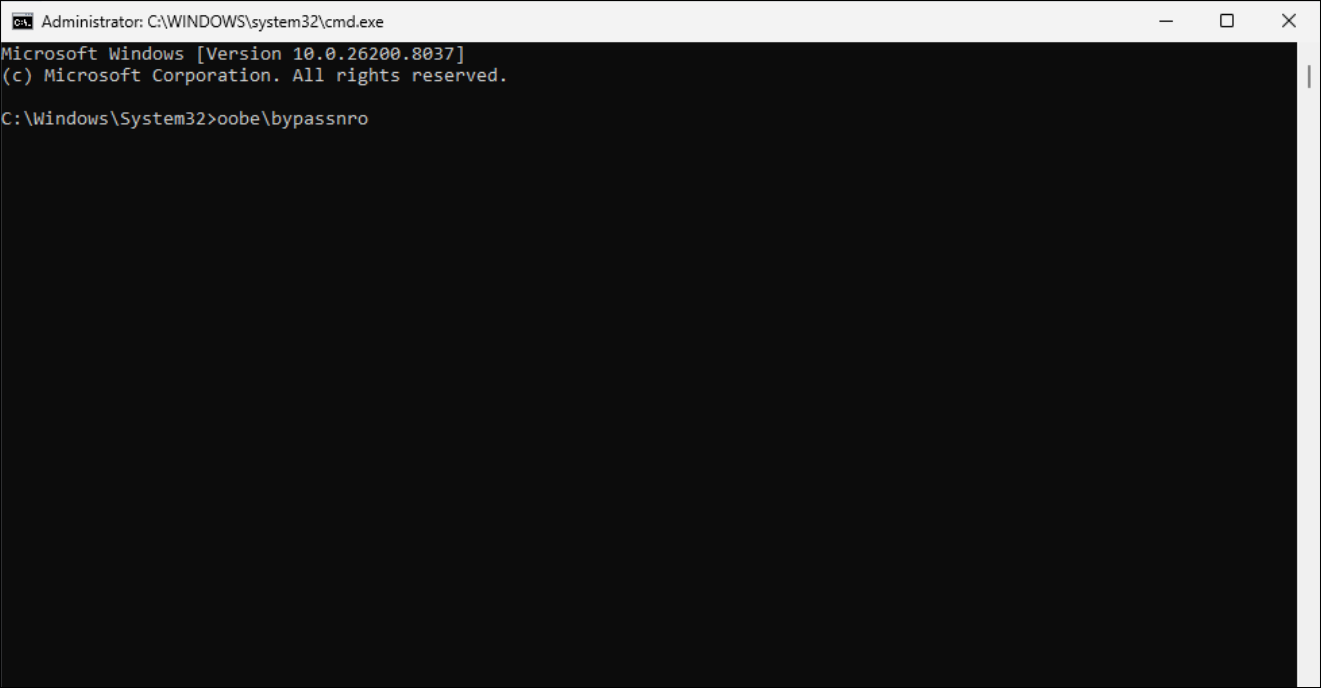
Phase 4: Final Configuration
Once you reach the desktop, you must install the full suite of drivers for proper performance.
- Open File Explorer and navigate to the VirtIO ISO.
- Run
virtio-win-gt-x64.msito install all missing system drivers.
Guest Agent Setup
The Guest Agent allows Proxmox to see the VM's IP address and shut it down cleanly.
- Inside the VirtIO ISO, open the
guest-agentfolder. - Run
qemu-ga-x86_64.msi.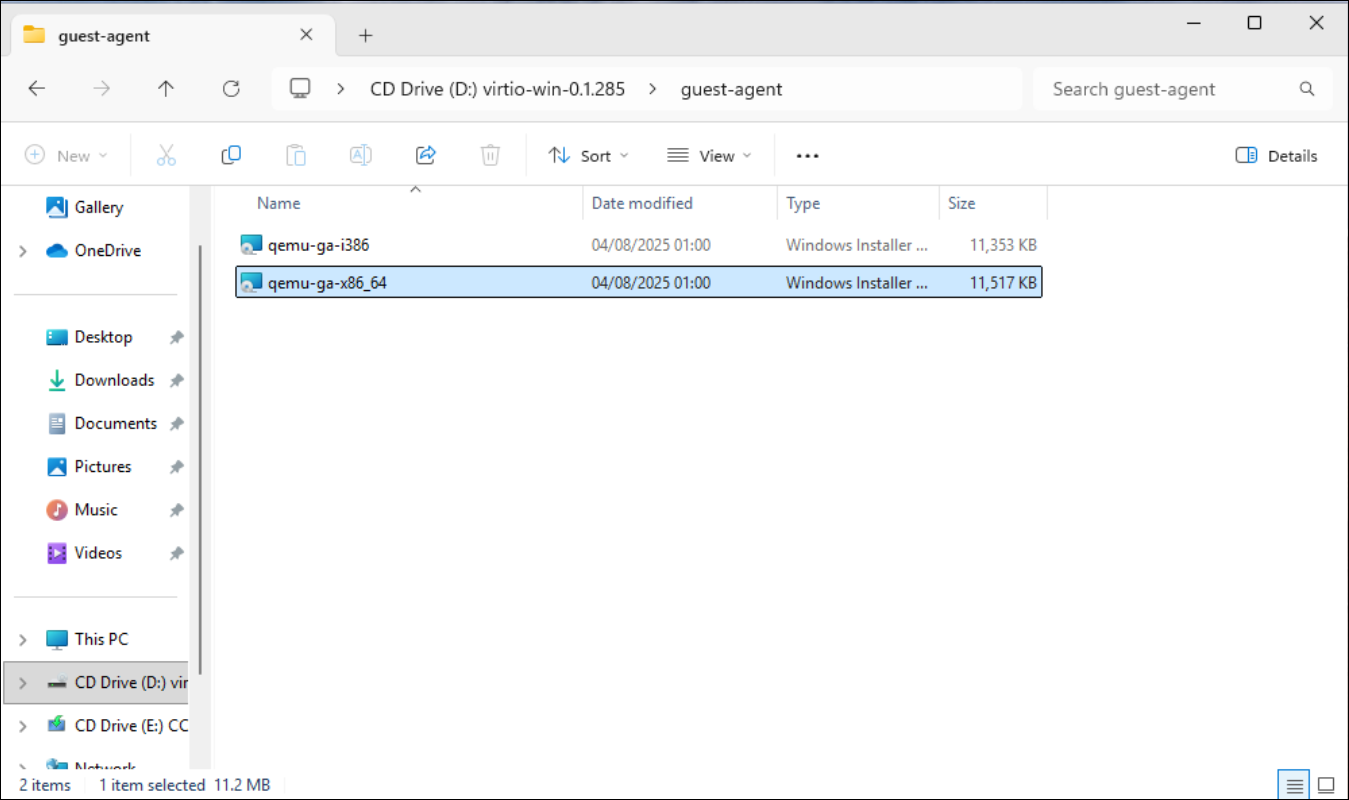
To verify the installation, open PowerShell and run:
Get-Service QEMU-GA
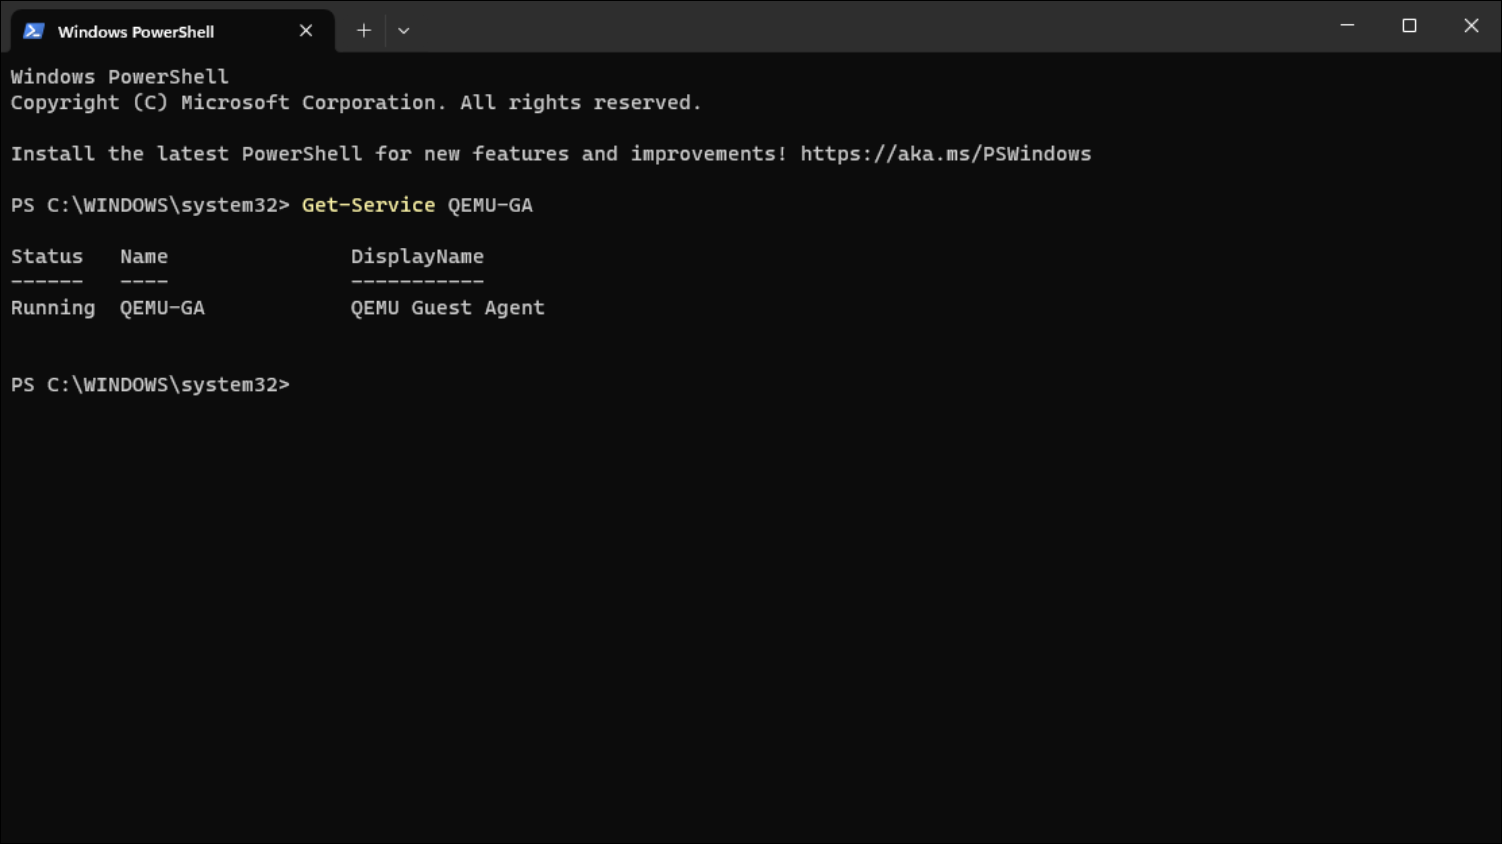
If the status is Running, your Windows 11 VM is fully optimized and ready for usage!
Read Next.

How to Access Raspberry Pi GPIO Pins Inside a Docker Container
Trying to control your Raspberry Pi's GPIO pins from inside a Docker container? Here is the quick solution using docker-compose and /dev/gpiomem.

Atomic Arch: How 1,500 AUR Packages Got Hijacked Without an Exploit
We analyze the recent Atomic Arch supply chain campaign. Threat actors took over orphaned Arch Linux packages to distribute a credential stealer and eBPF rootkit. Here is what you need to know about the breach.

Building the Ploopy Adept BLE (Any Ball Mod)
A comprehensive guide on how to build a wireless Ploopy Adept trackball, featuring the highly recommended Any Ball mod, ordering the PCB, and assembling the components.