How to Disassemble the HP 920/925: Fixing the Broken Scroll Wheel

If you’ve found this page, you’re likely experiencing the "HP 920 scroll wheel jump." It’s a frustrating issue where scrolling down causes the page to jitter or jump upward—or, in my case, the wheel fails entirely.
As I mentioned in my review, the build quality of the HP 920/925 is disappointing, but the ergonomics are too good to give up without a fight. Since this mouse isn't built for easy repair, I’ve put together this guide to help you navigate the internals without snapping any delicate plastic.
Tools You’ll Need
- Small Phillips head screwdriver.
- Torx Screwdriver: You will need a Torx bit for the internal screws. Crucially, this driver needs a long, thin shaft; the screw wells inside the assembly are surprisingly deep and narrow.
- A guitar pick or plastic prying tool.
- Optional: Tweezers (can be helpful for ribbon cables, though not strictly necessary).
- Optional: Rubbing alcohol or contact cleaner (if you are just cleaning the encoder).
Step-by-Step Disassembly
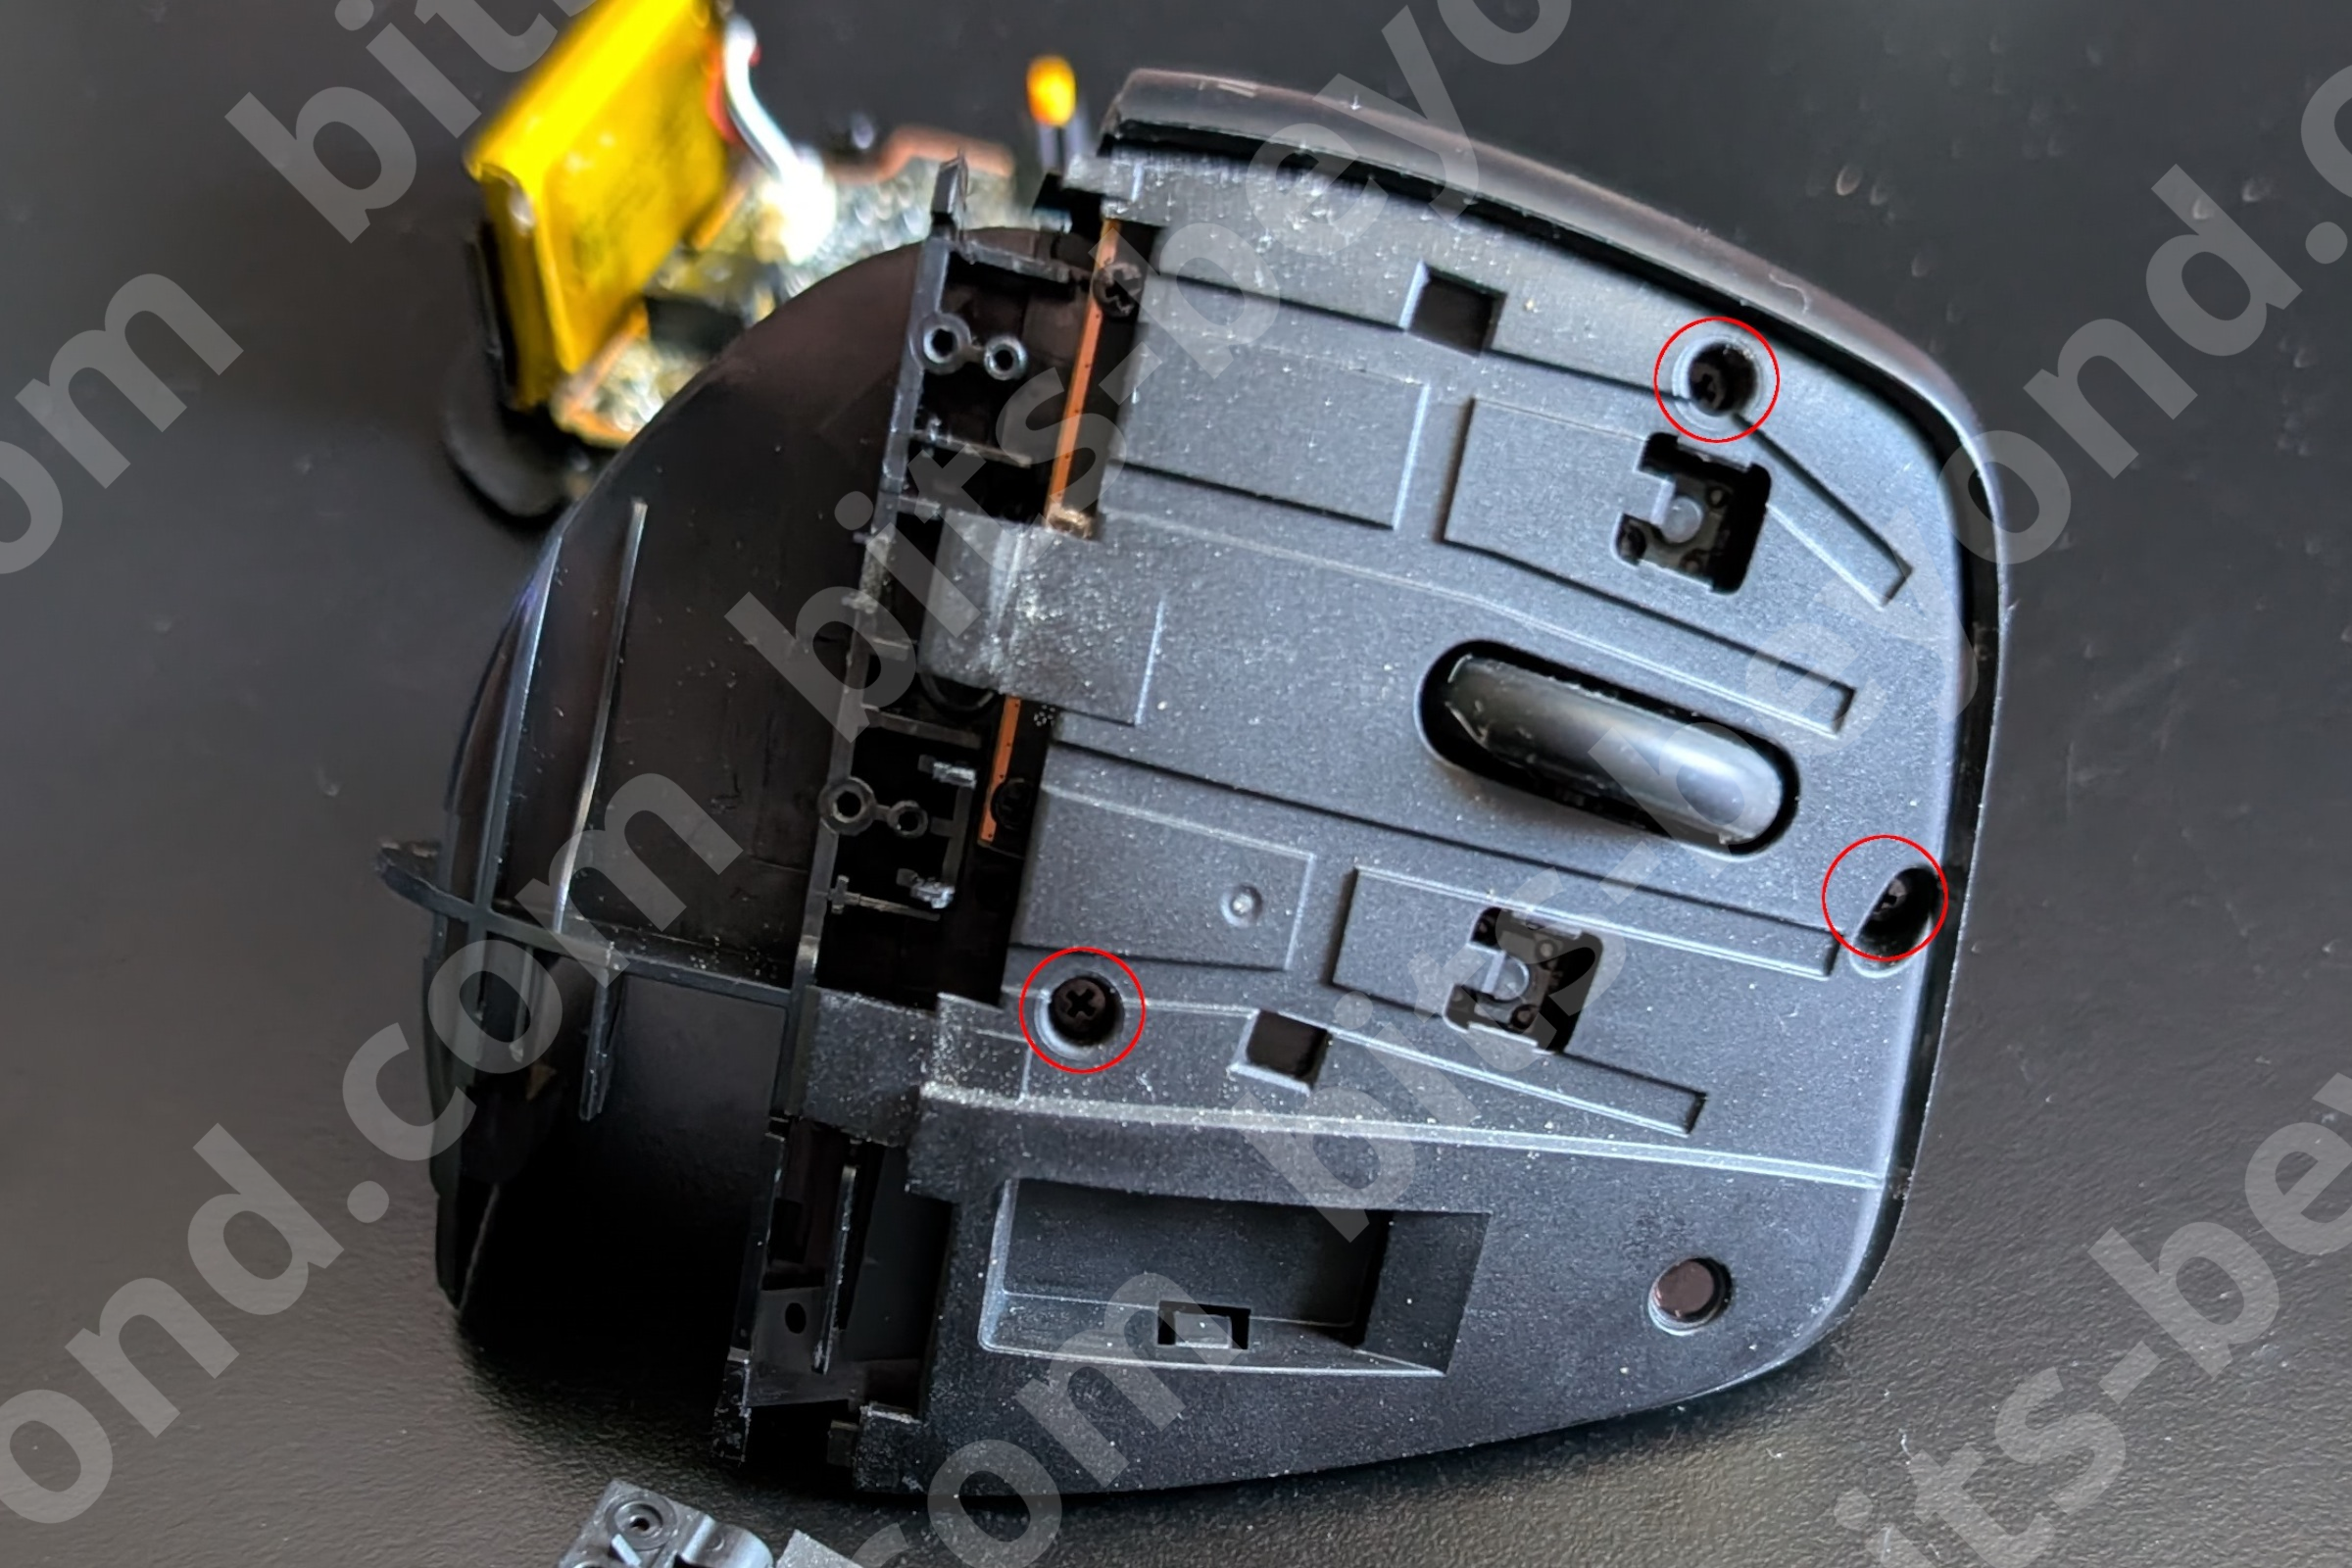
1. Removing the Base
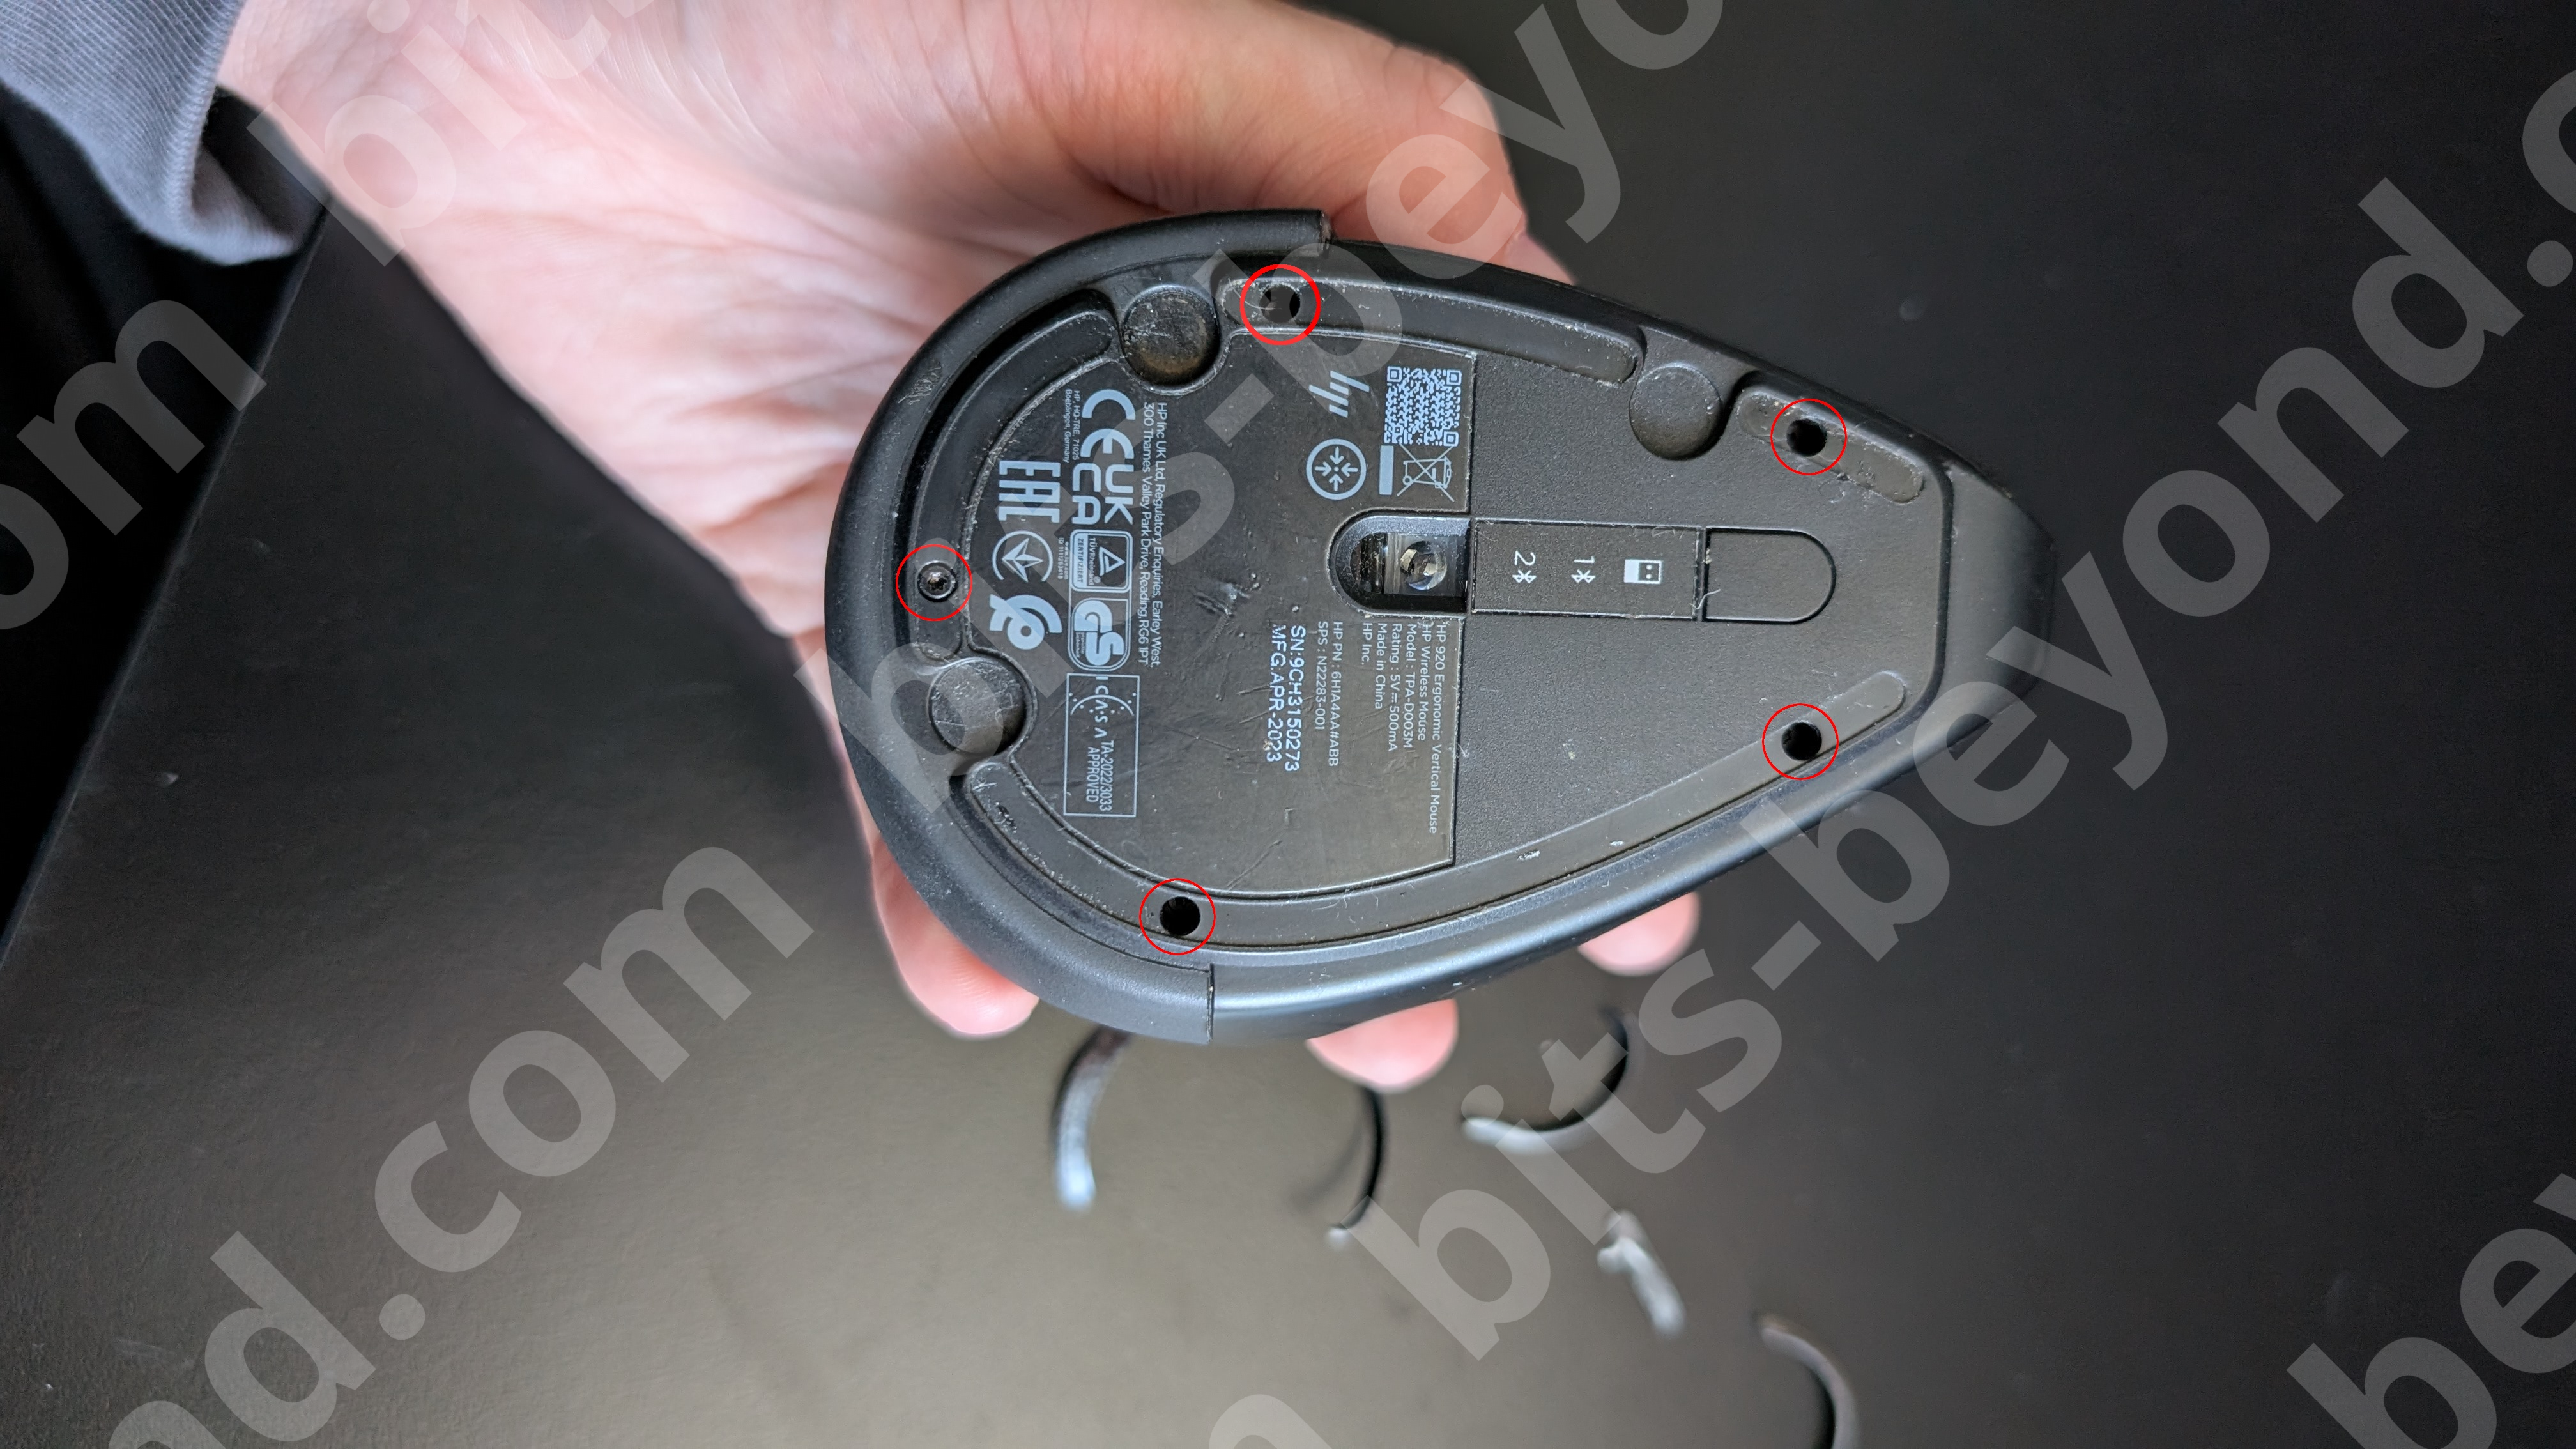
Flip the mouse over. You will need to peel off the four rubber glide pads at the corners. Try to do this gently so you can reuse the adhesive later. Underneath, you will find five screws. Remove these to begin.
2. Separating the Shell
Gently lift the top part of the mouse away from the base. Be careful: The two halves are connected by internal wiring.
3. Disconnecting the Internals
To get enough room to work, you need to manage the cables:
- Ribbon Cables: Locate the ribbon cables connecting the boards. Important: Release the tiny locking mechanism on the connector before pulling the cable out.
- The Power Cable: There is a single soldered cable that keeps the halves tethered. You can desolder this for a total teardown, but it’s not strictly required if you are careful to work around it.
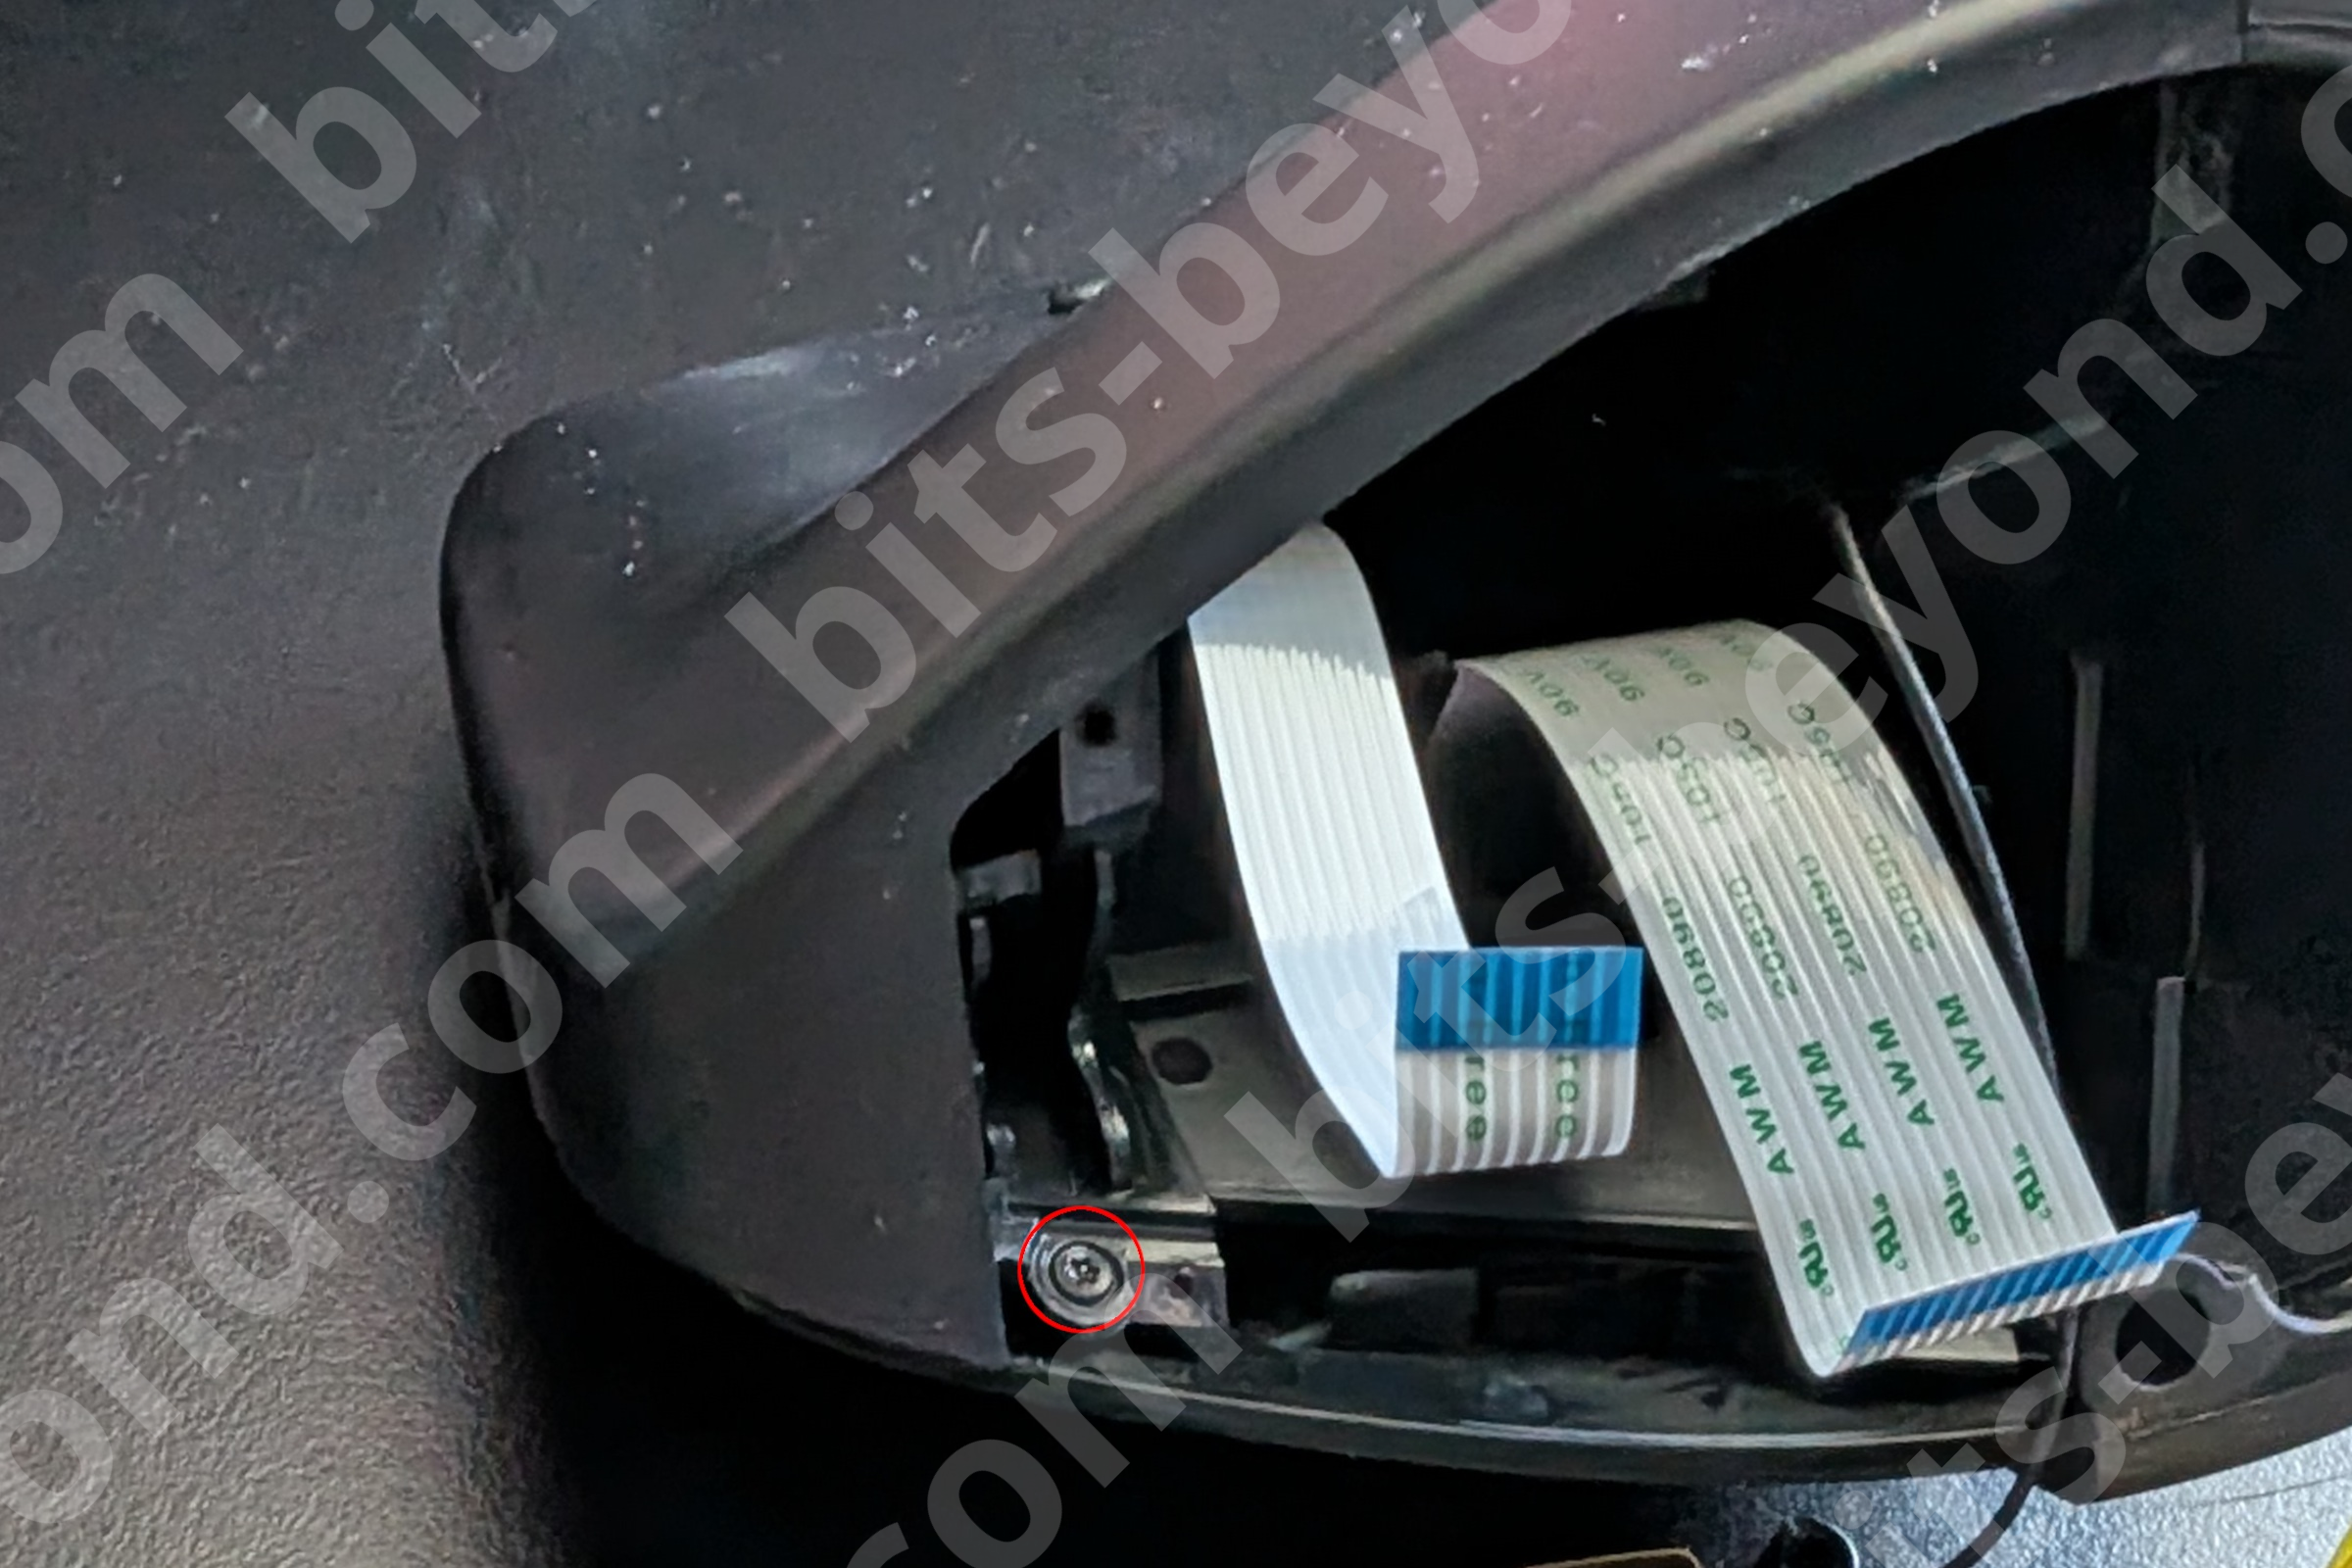
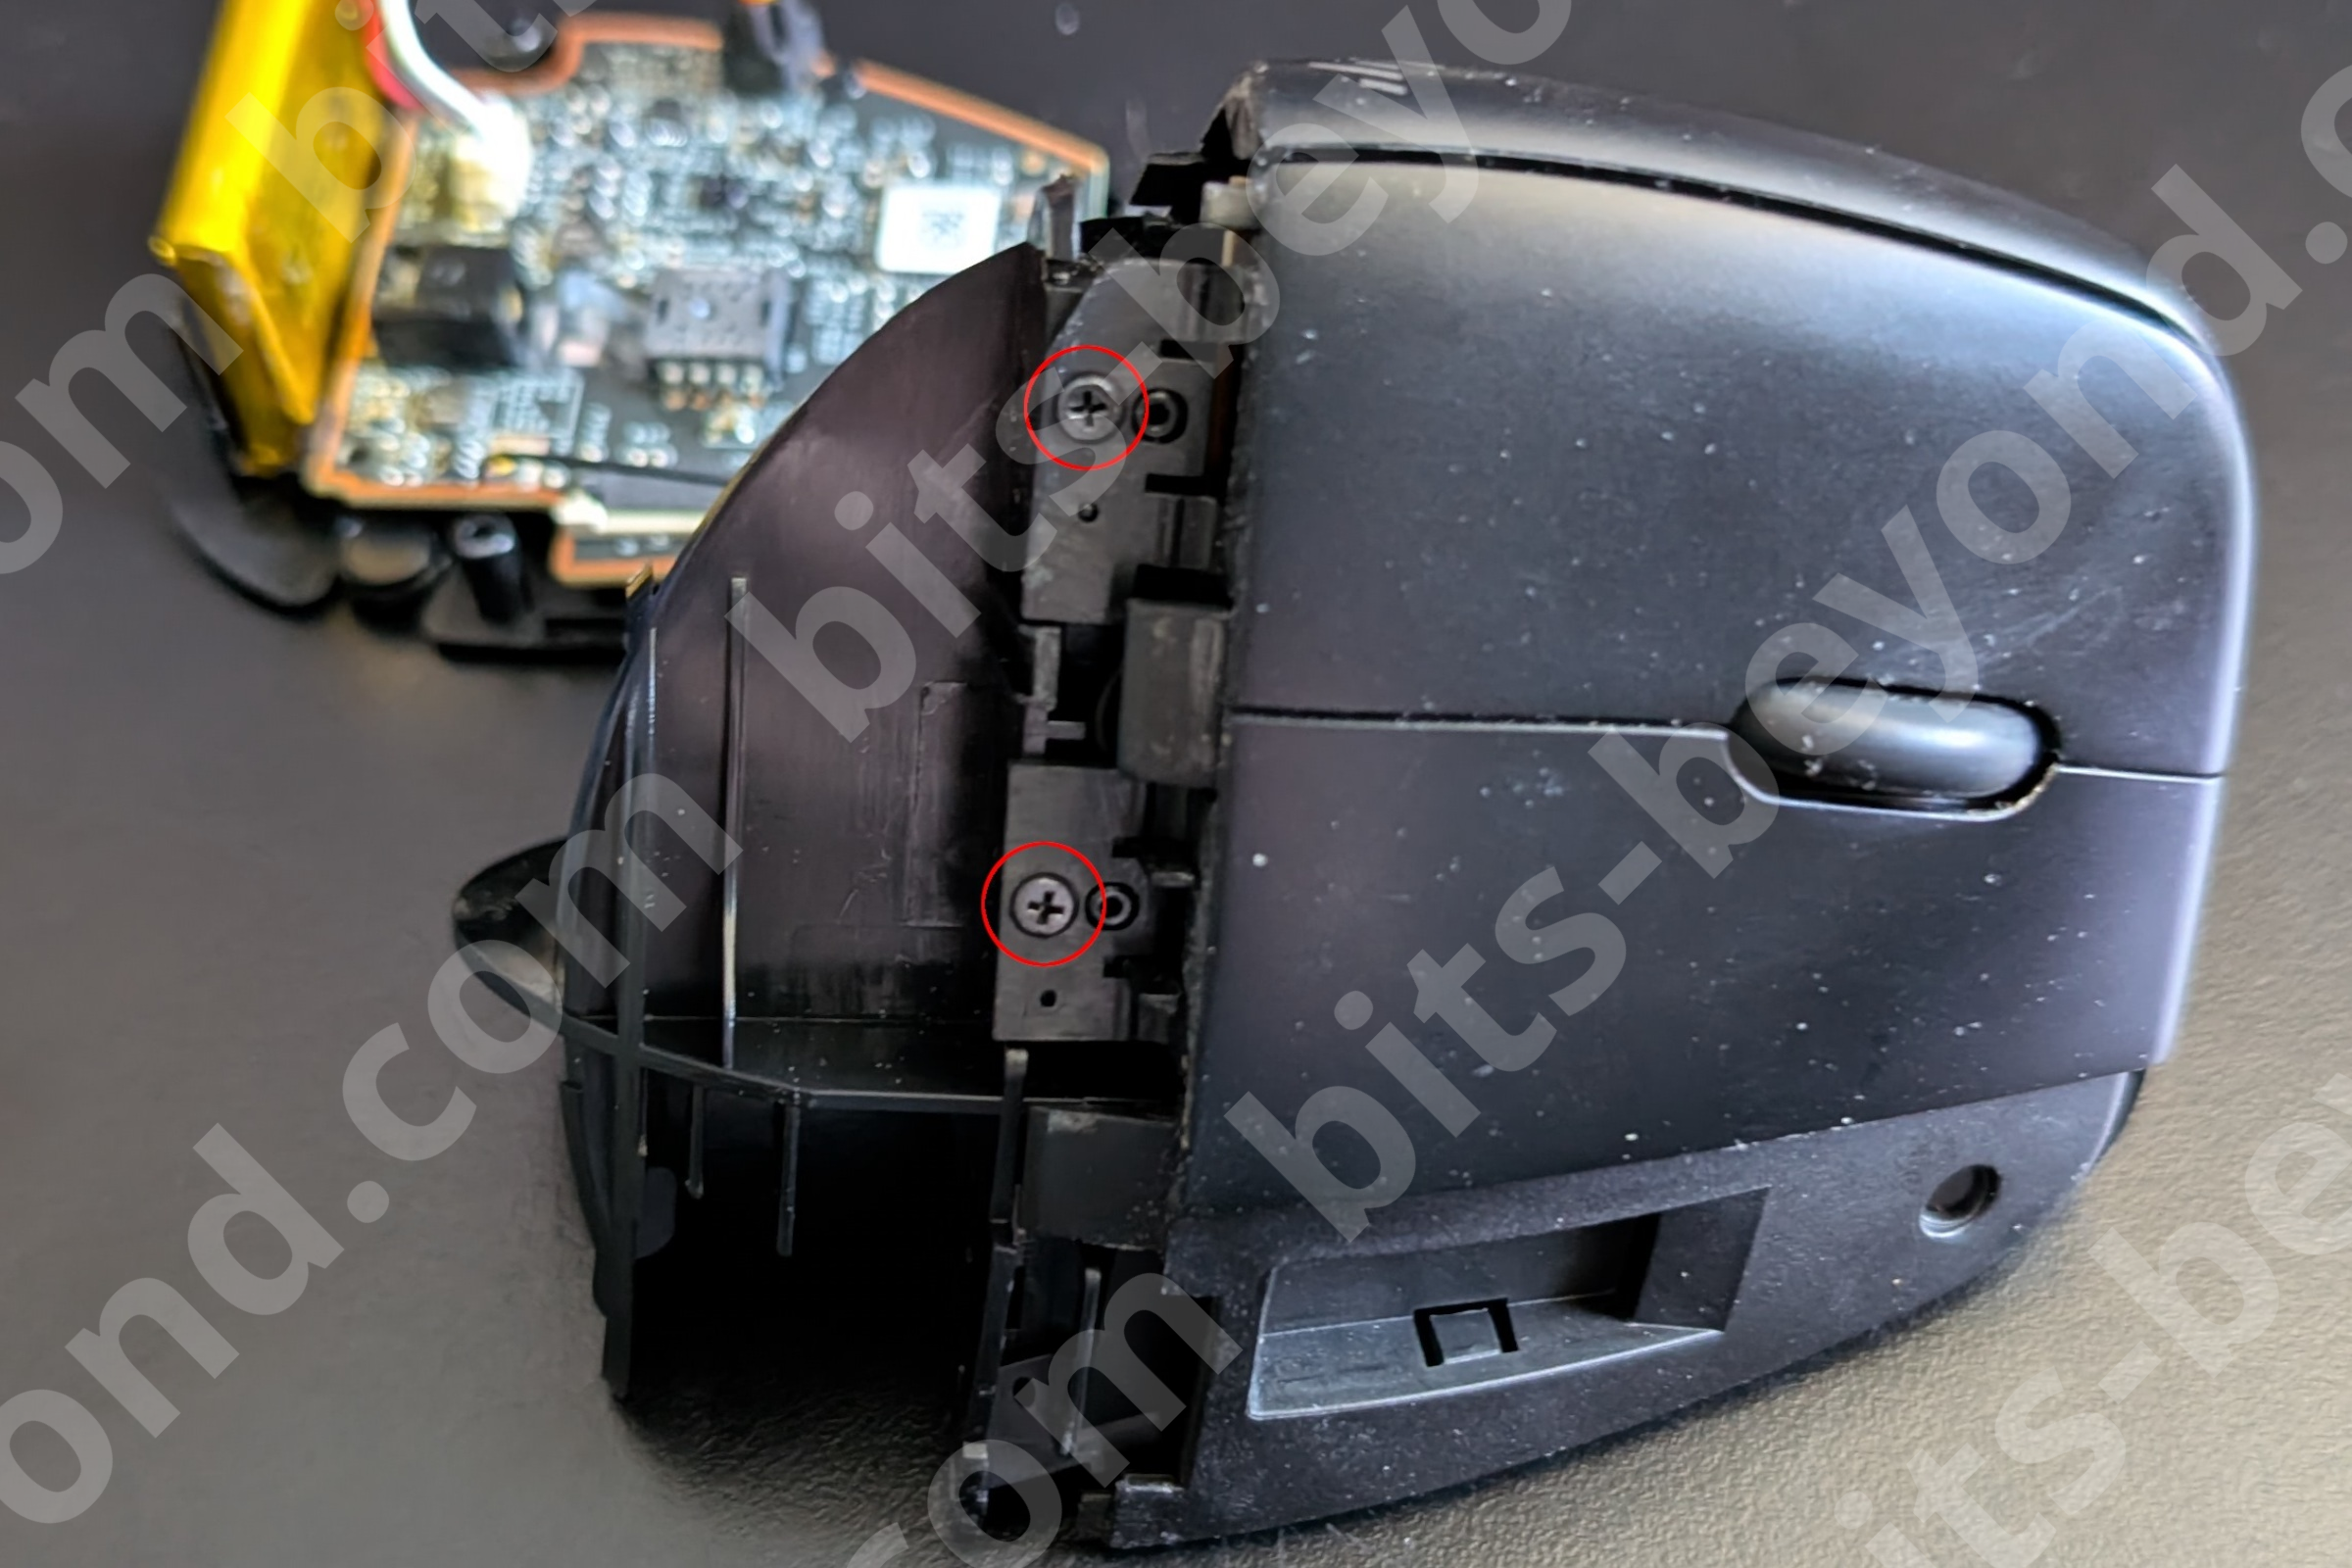
4. Opening the Top Assembly
This is where it gets tricky. First, locate and unscrew the single screw visible on the inner frame (indicated in the image below).
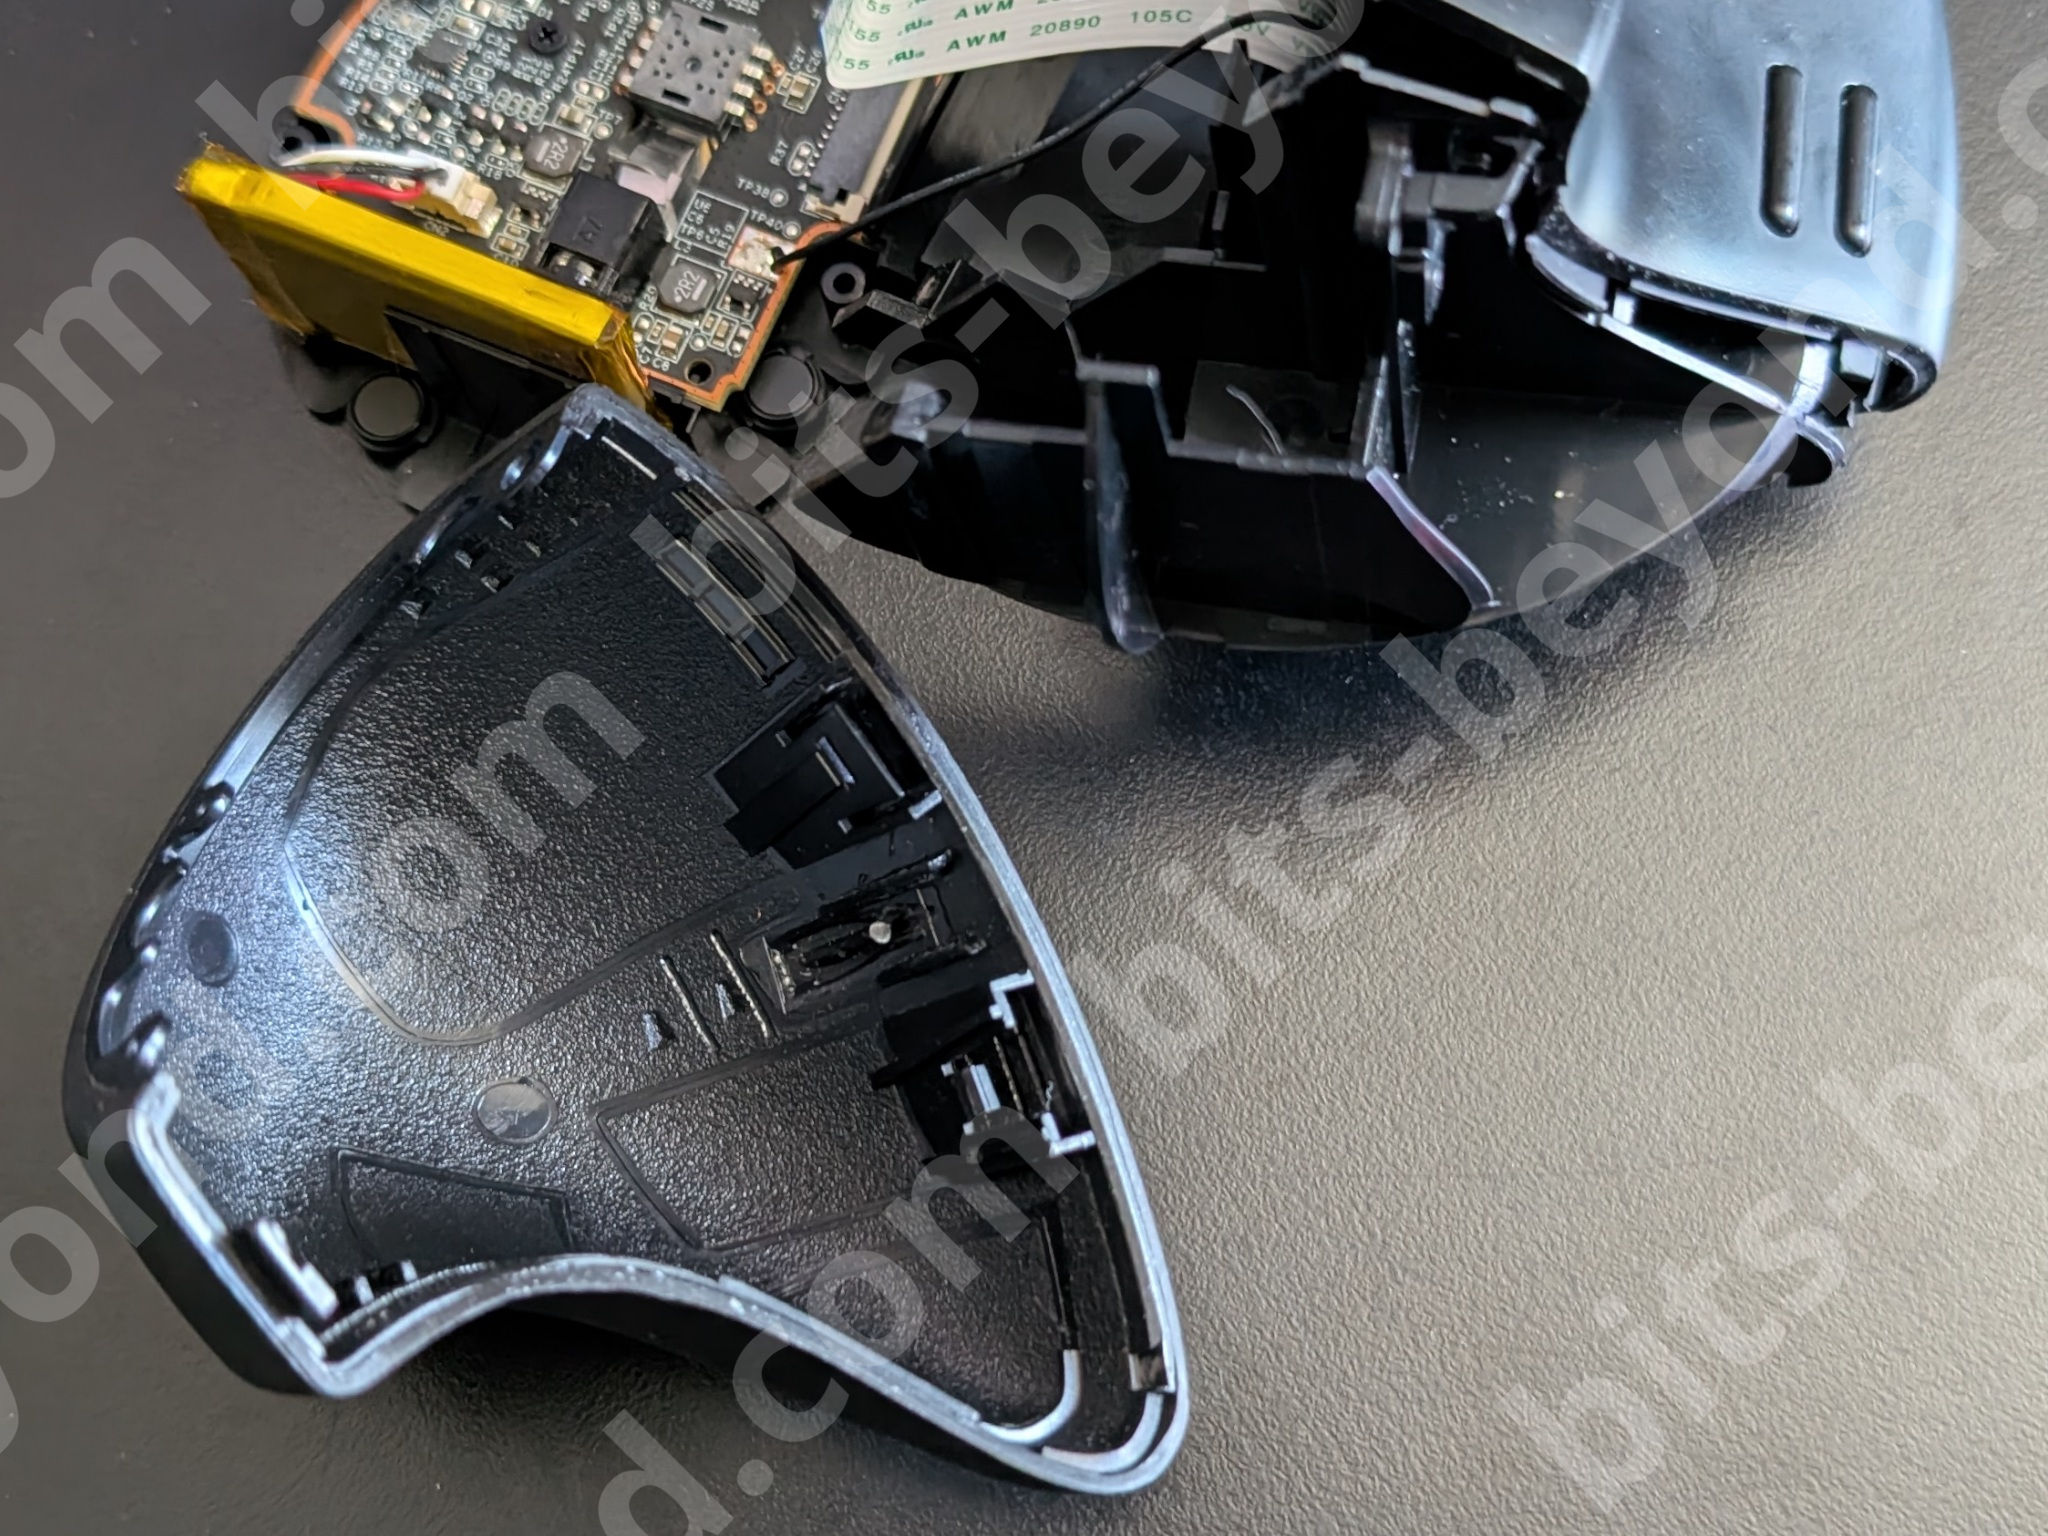
Next, you need to separate the top plastic shell of the mouse. Use a guitar pick or a thin plastic pry tool to work your way around the seam. It is held by tight clips and requires a bit of patience to pop open without scarring the plastic.
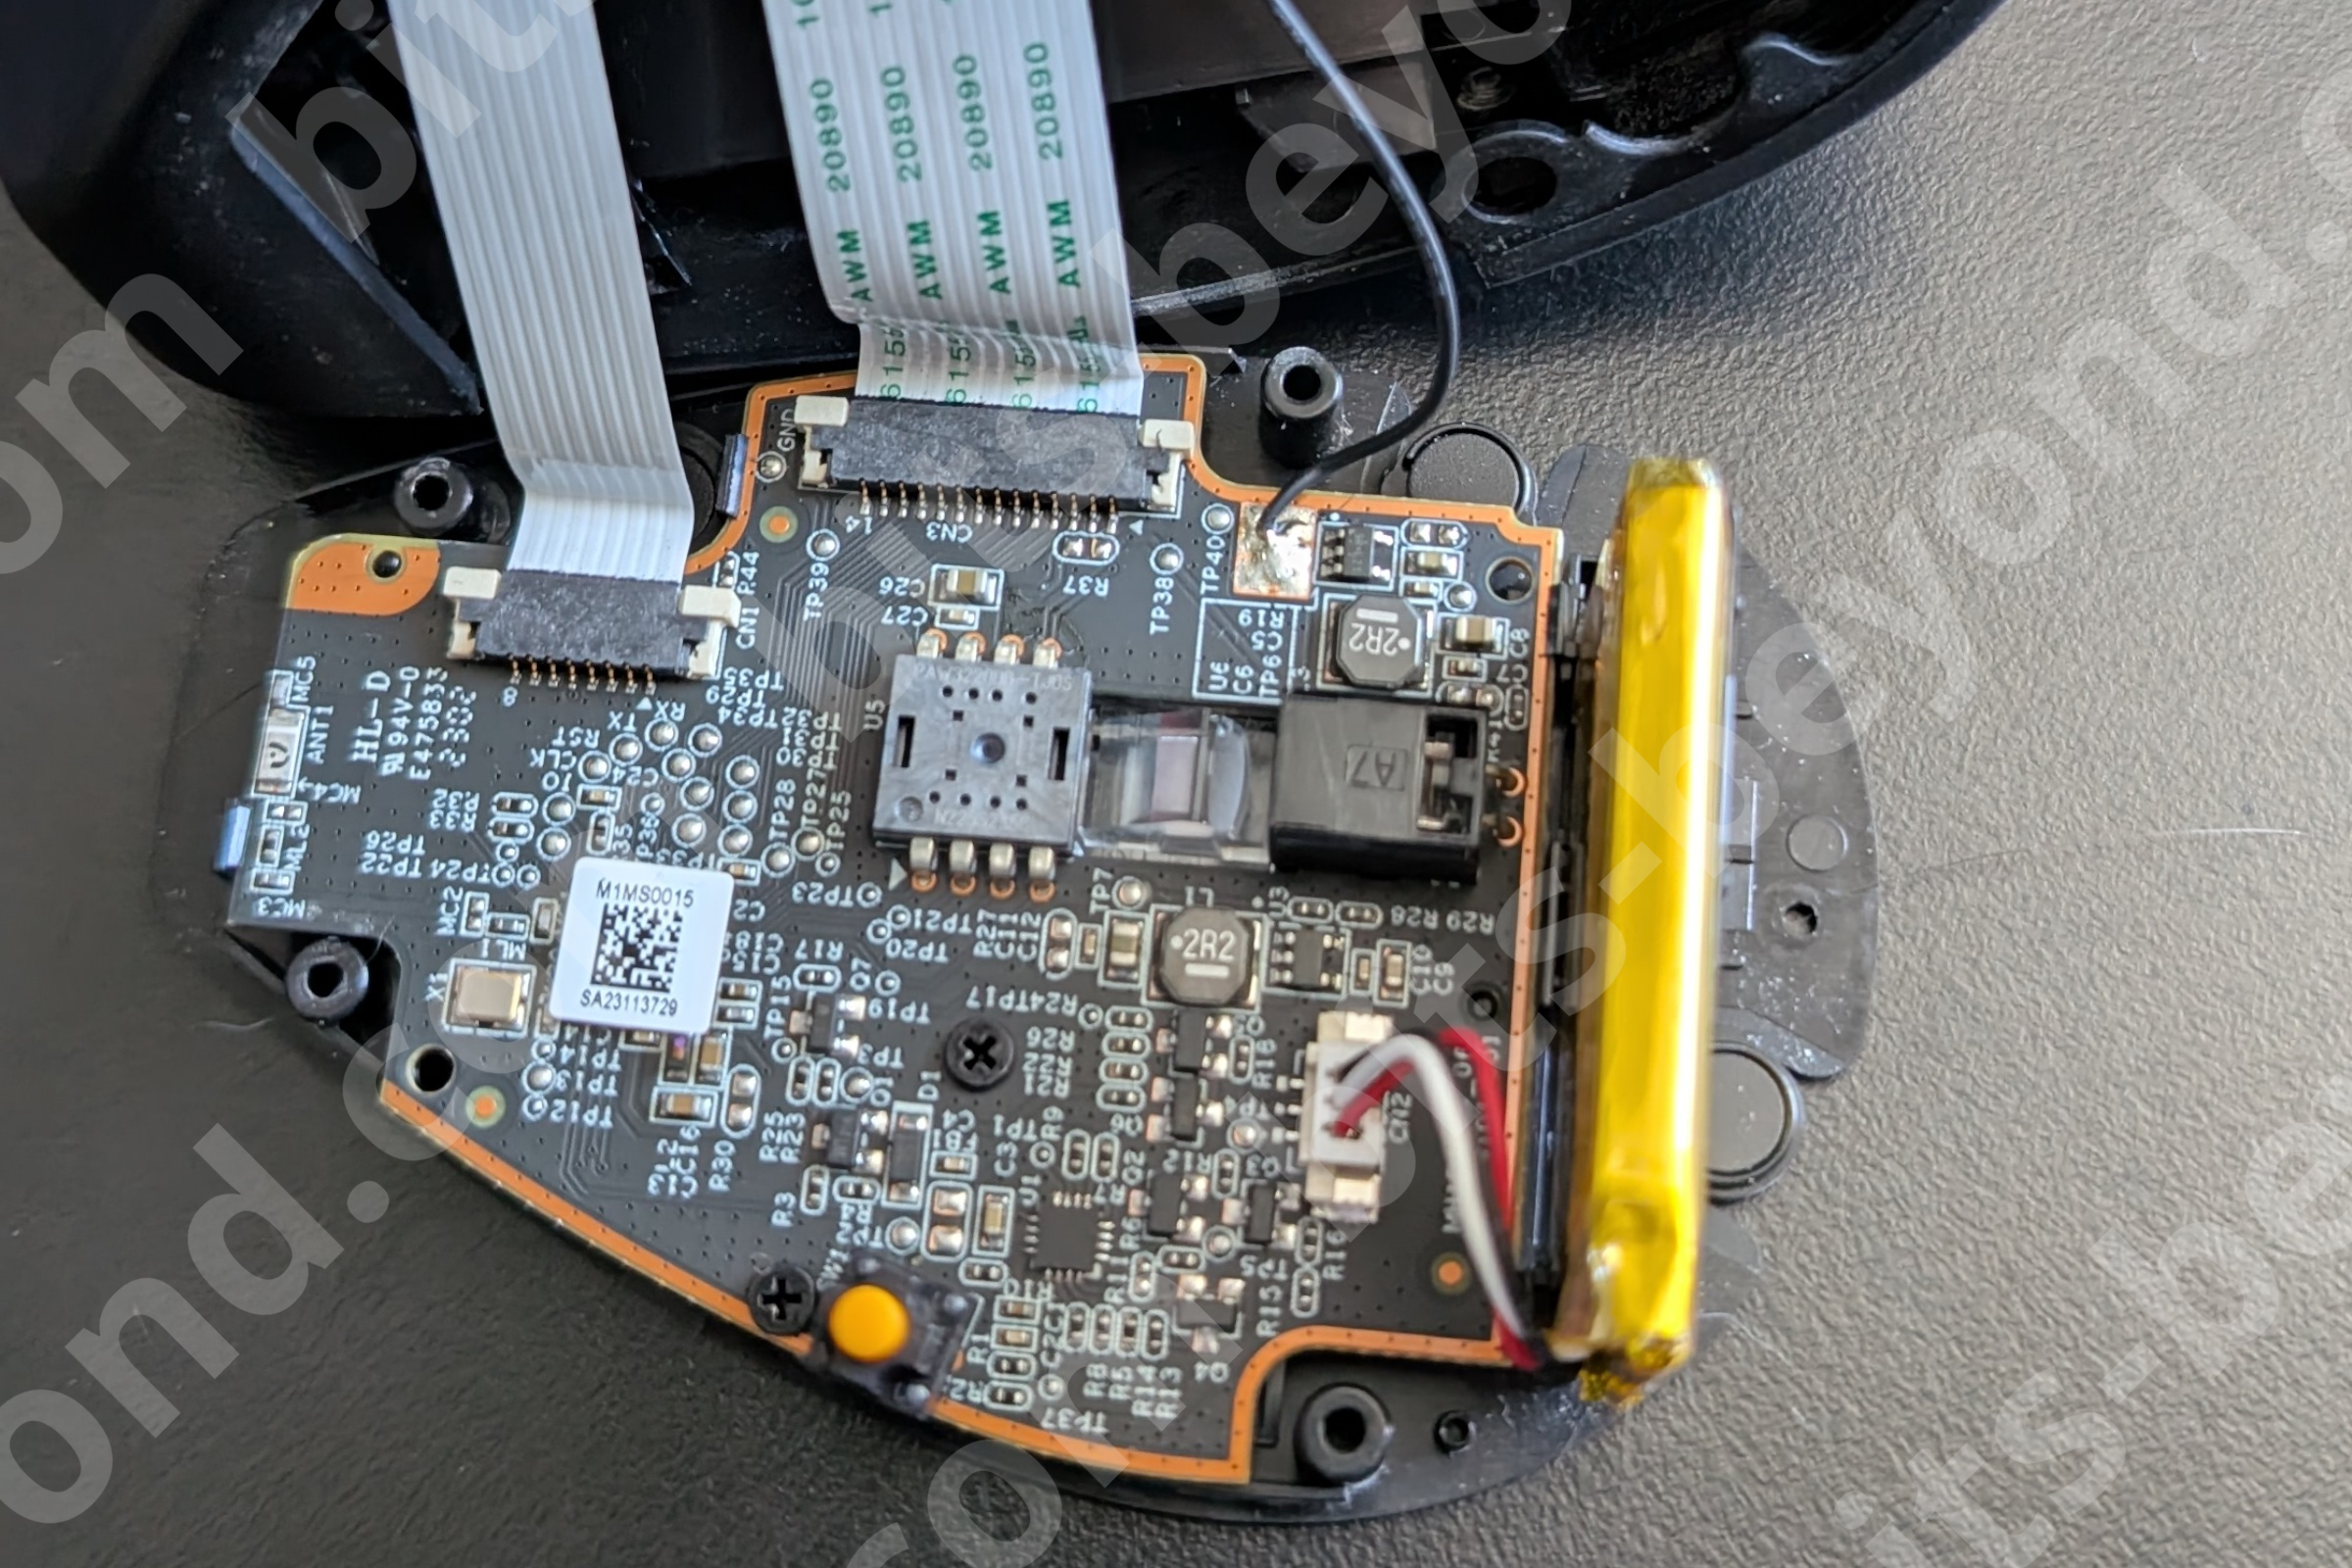
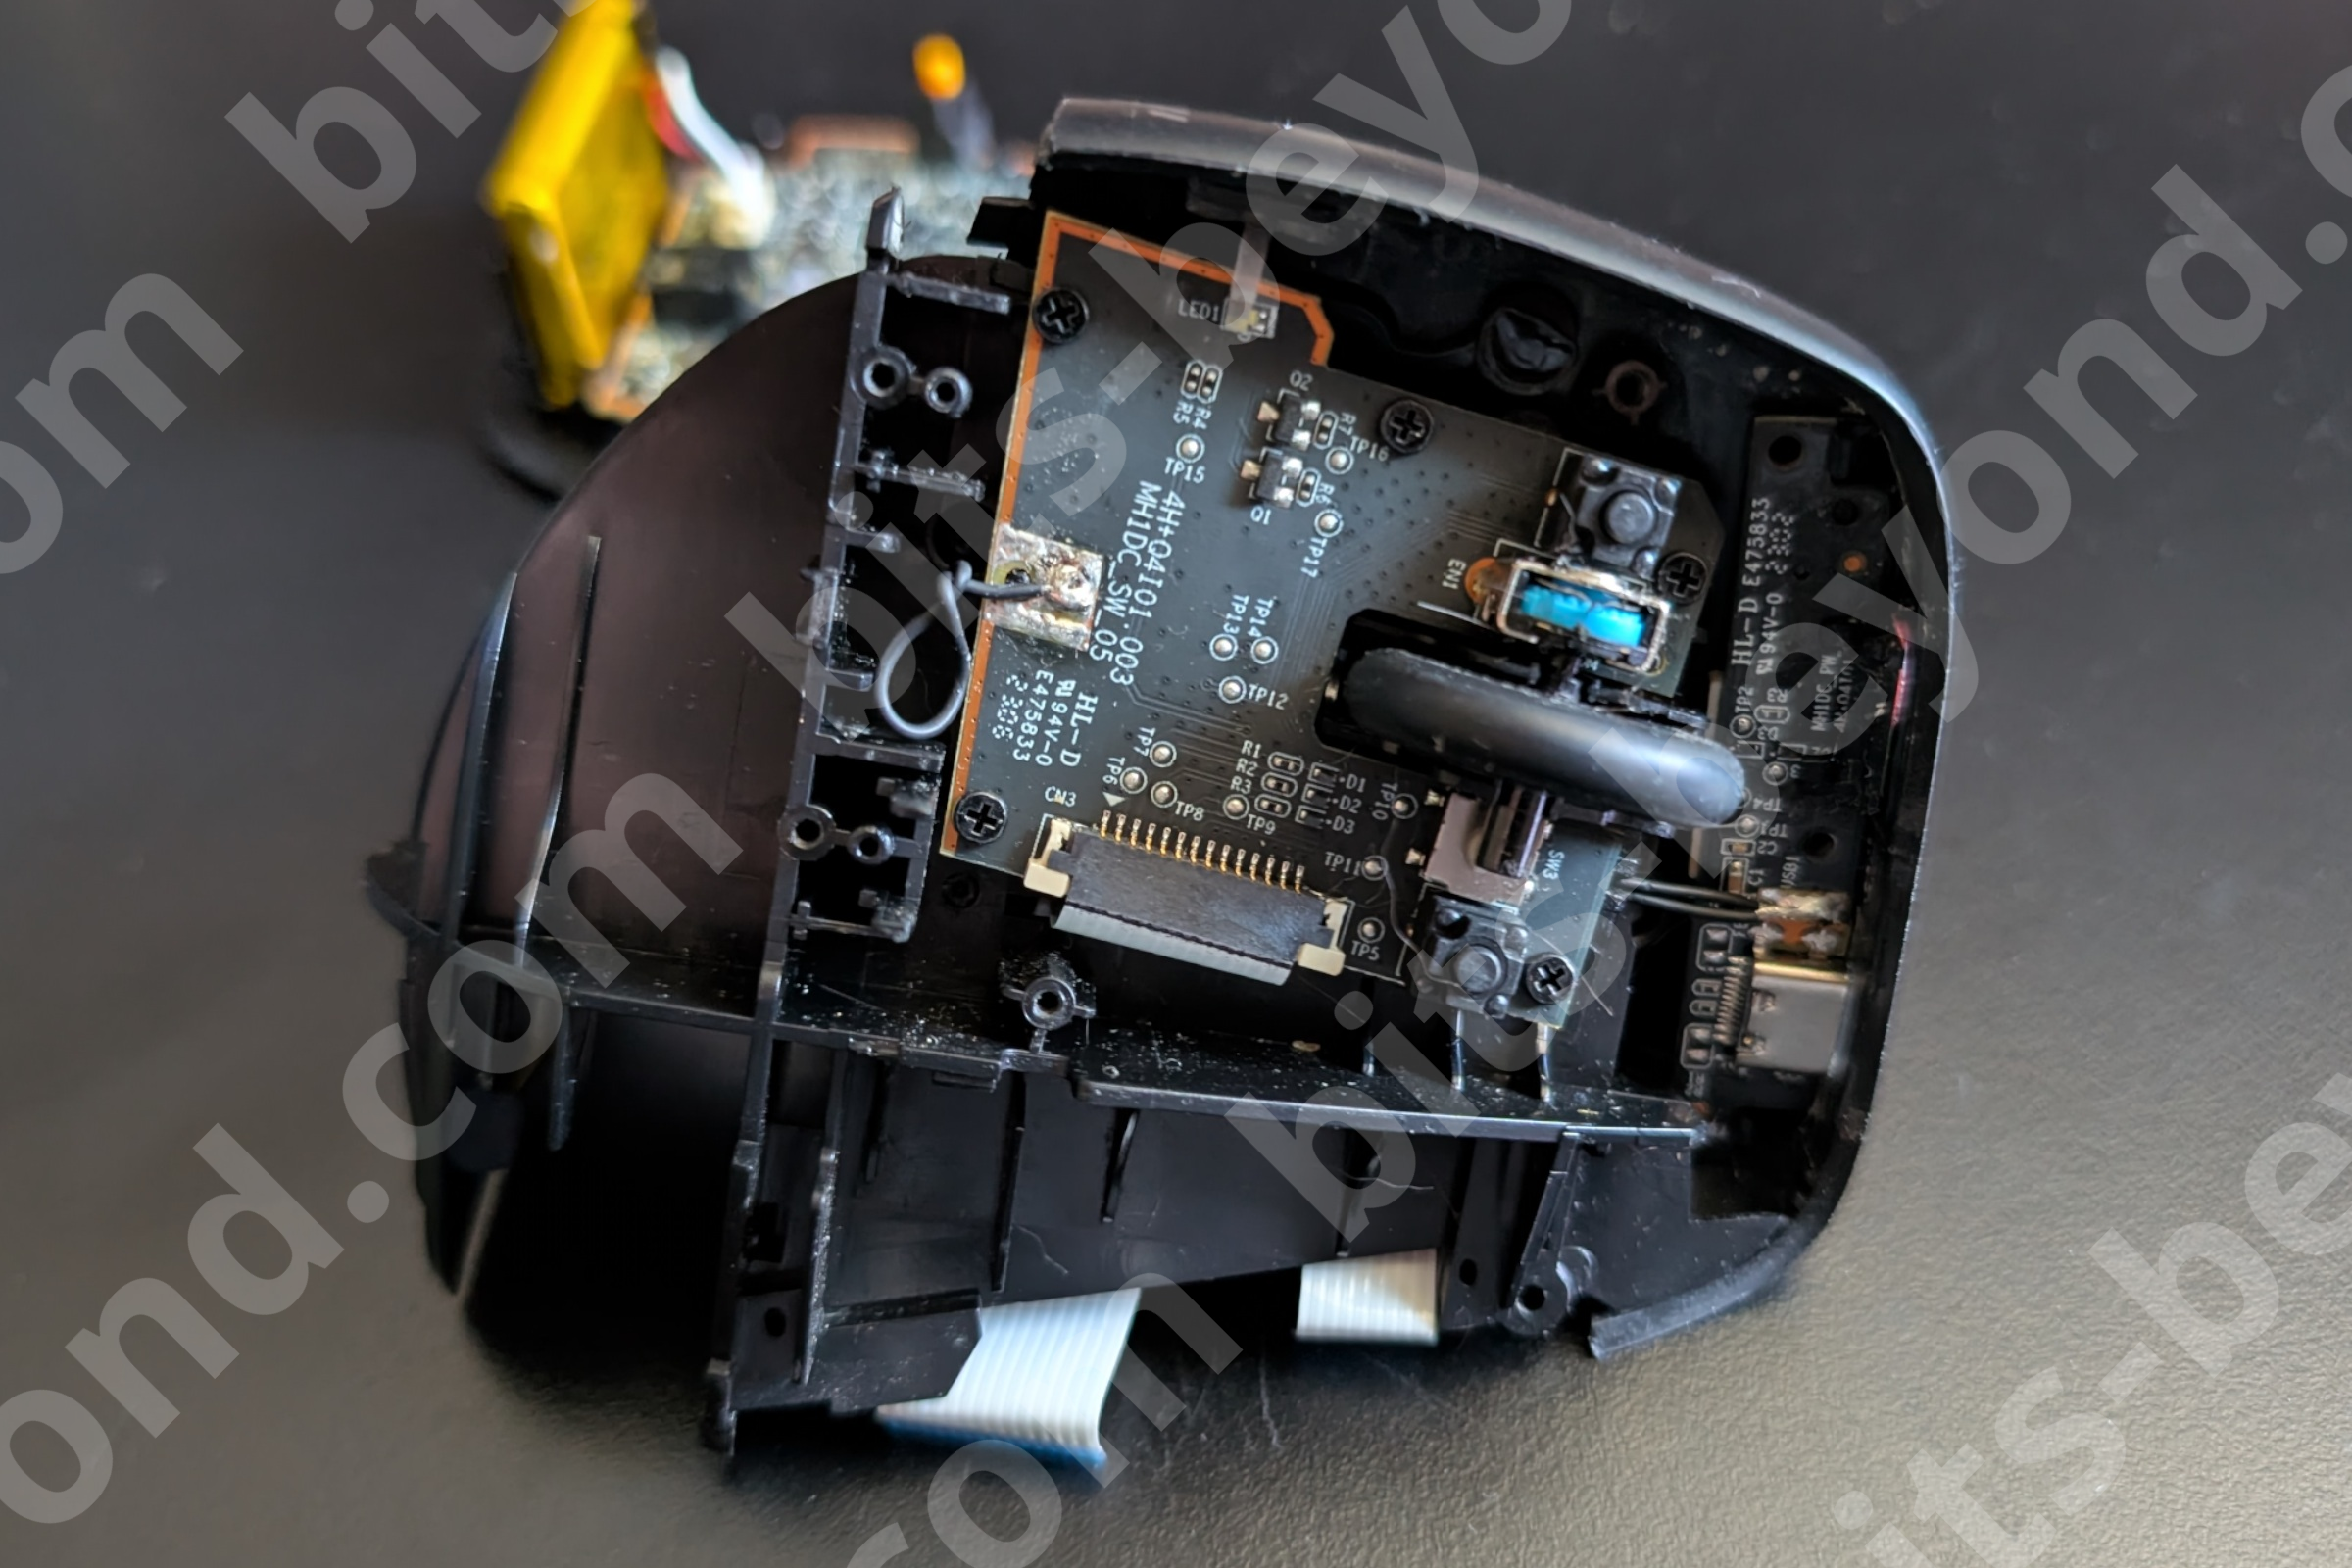
After this the mouse will look like this:
5. Removing the Buttons
Once the top shell is off, you’ll see the mouse button assembly. Unscrew the two screws holding them in place. To remove the buttons, slide them forward (toward the front of the mouse) and then lift up.
6. Accessing the PCB
Finally, unscrew the three screws holding the internal PCB cover.
Once this cover is removed, you have full access to the PCB and the scroll wheel assembly.
The Verdict: Can you fix it?
Once you are inside, you will likely find one of two scenarios:
-
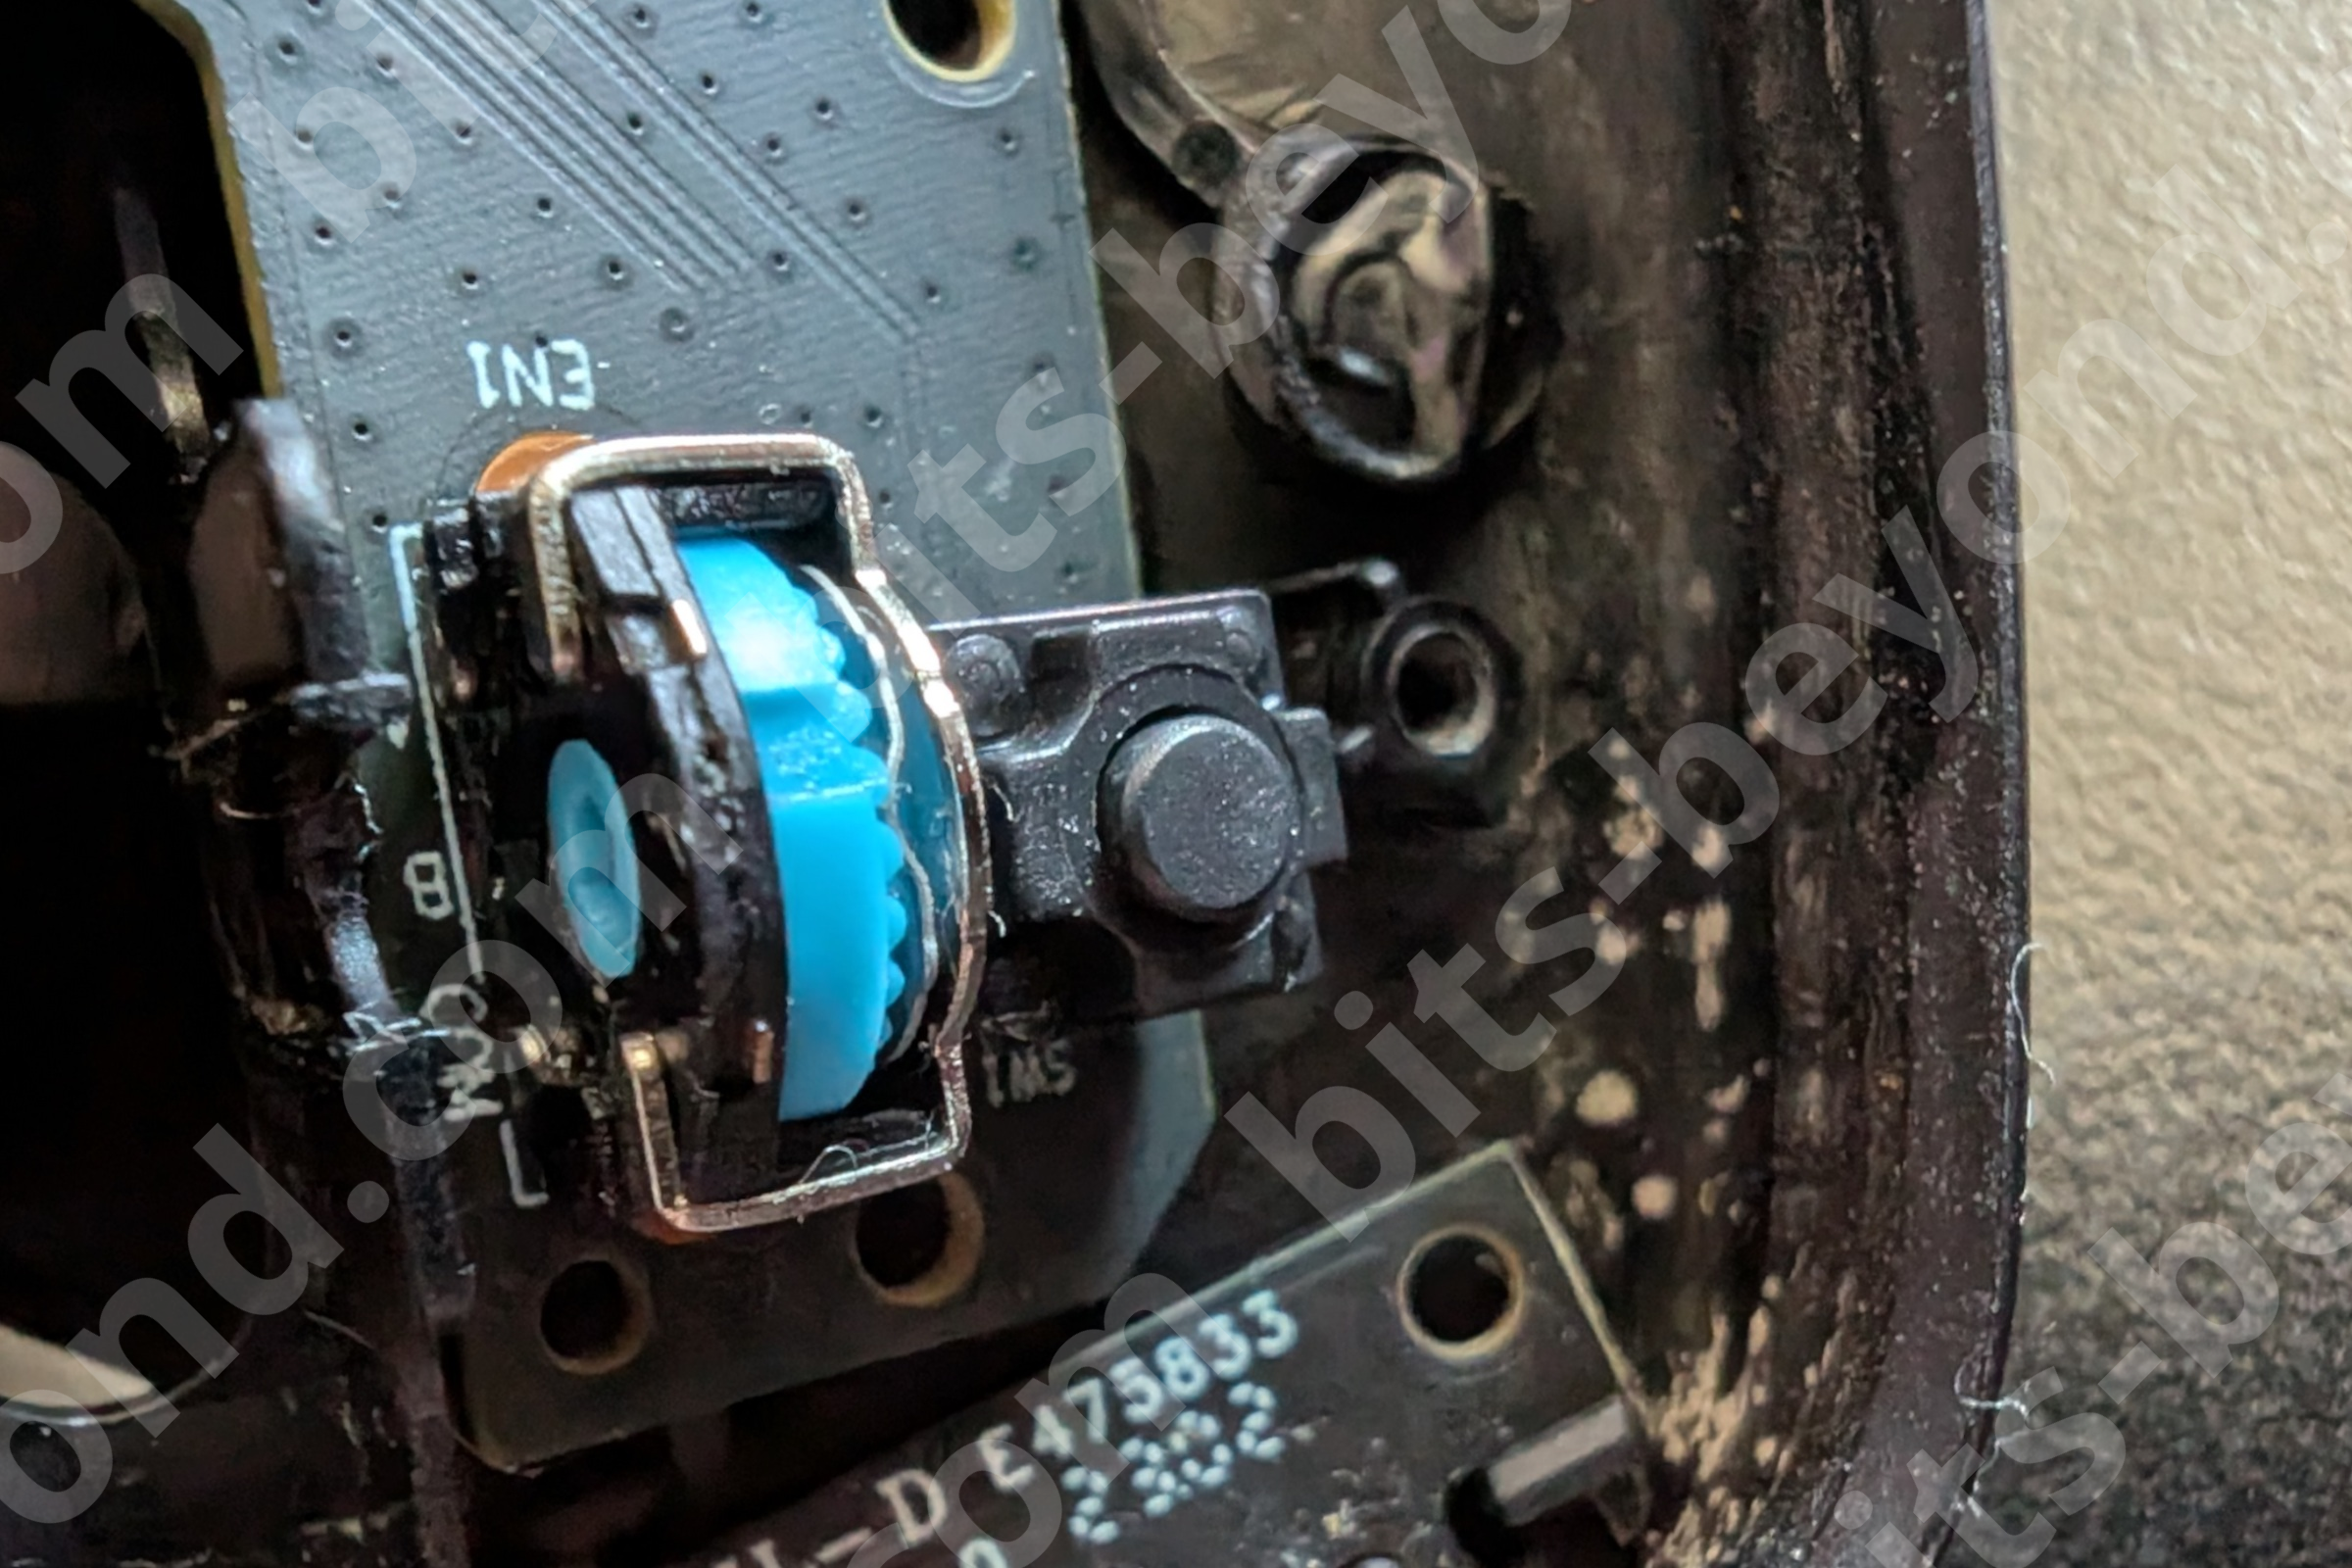
The "Jumping" Wheel: If your wheel still spins but the screen jumps, the scroll wheel encoder (the part the wheel axle sits in) is likely dirty. A quick blast of electronic contact cleaner or a drop of high-percentage rubbing alcohol into the encoder while spinning it often fixes the jitter.
-
The Broken Axle: In my case, the hexagon adapter part of the scroll wheel had actually snapped off inside the encoder.
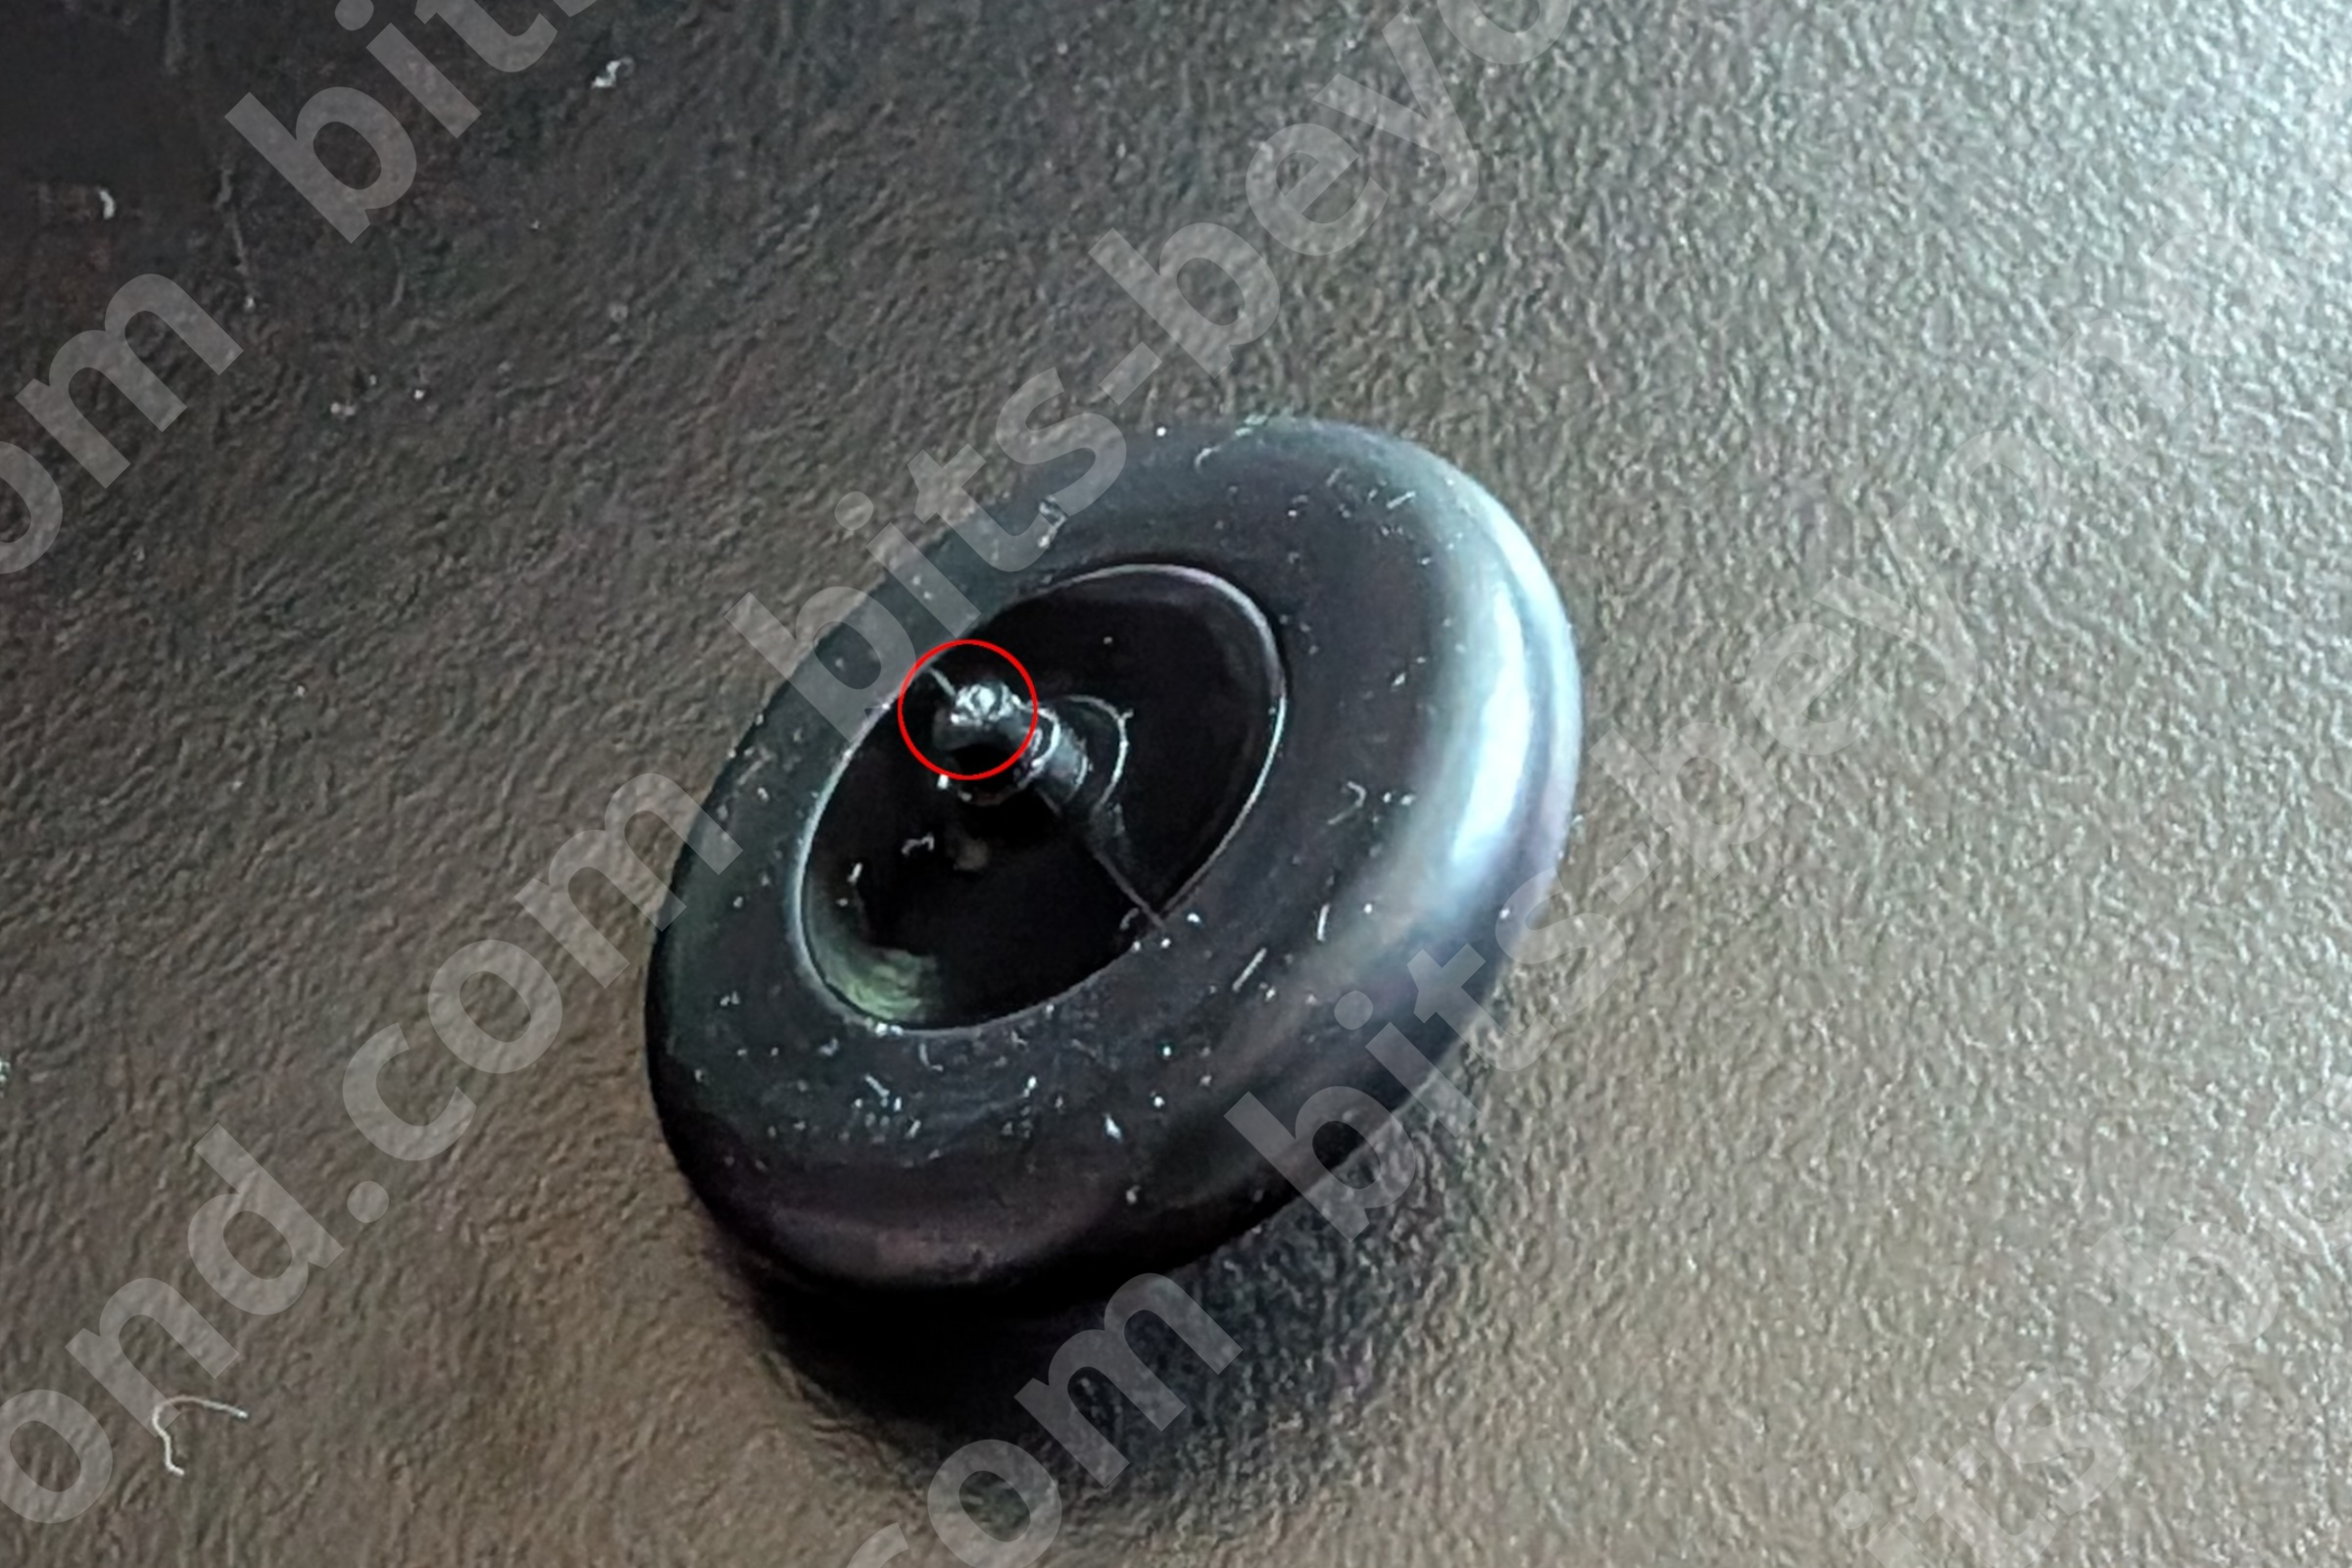
Because the HP 920 uses a custom, smaller-than-standard wheel size, finding a replacement part online is nearly impossible. I am currently in the process of 3D printing a replacement wheel.
If you managed to get yours open, or have any questions let me know! Are you dealing with a dirty encoder or a total mechanical failure?
Stay tuned for my next post where I’ll share the 3D print files if my custom scroll wheel fix proves successful!
Read Next.

HP 920/925 Review: The Almost Perfect Vertical Mouse with a Catch
The HP 920/925 Ergonomic Vertical Mouse feels amazing for medium-sized hands, but poor build quality and a failing scroll wheel hold it back.

Atomic Arch: How 1,500 AUR Packages Got Hijacked Without an Exploit
We analyze the recent Atomic Arch supply chain campaign. Threat actors took over orphaned Arch Linux packages to distribute a credential stealer and eBPF rootkit. Here is what you need to know about the breach.

Building the Ploopy Adept BLE (Any Ball Mod)
A comprehensive guide on how to build a wireless Ploopy Adept trackball, featuring the highly recommended Any Ball mod, ordering the PCB, and assembling the components.